Instance Profiles
Note
This module is labeled Instance Profiles in the UI.
What Is an Instance Profile?
An instance profile defines compute allocation defaults for virtual machines, including CPU, memory, storage behavior, and optional GPU settings. It standardizes VM sizing across your infrastructure.
Start Here
Open
Control Center -> Compute Policies -> Instance Profiles.Continue to the detailed steps below.
Quick and Important Information
Key Concepts
CPU Cores: Number of vCPUs allocated per VM.CPU Speed: Per-core speed in MHz.Memory: RAM allocation in MB.Storage Type:SharedorLocal.Customized: Whether users can override CPU/memory at deploy time.GPU: Optional passthrough configuration for GPU workloads.
Actions
Create: Click
+ Create Instance Profileand fill identity, compute, storage, and optional GPU fields.Edit: Use row edit action to update allowed profile fields.
Delete: Use row delete action (blocked when active dependencies exist).
Tip
Create separate instance profiles for GPU and non-GPU workloads.
Tip
Choose Shared storage for workloads that require high availability and live migration.
Warning
VMs with GPU passthrough are pinned to a specific host and cannot be live-migrated.
Warning
You cannot delete an instance profile that is actively in use by running virtual machines.
Step: Review Instance Profiles Dashboard
When to Use: Use this first when validating existing compute profiles before any create or edit operation.
Purpose: Understand current instance profile inventory and state.
Steps:
Open
Control Center -> Compute Policies -> Instance Profiles.Review dashboard controls (search/filter, table, and
+ Create Instance Profileaction).Review key columns:
Name,Display Text,Resources,Storage Type,Provisioning Type,State,Volume Profile,Customized, andGPU.Confirm which profiles are currently
Active.
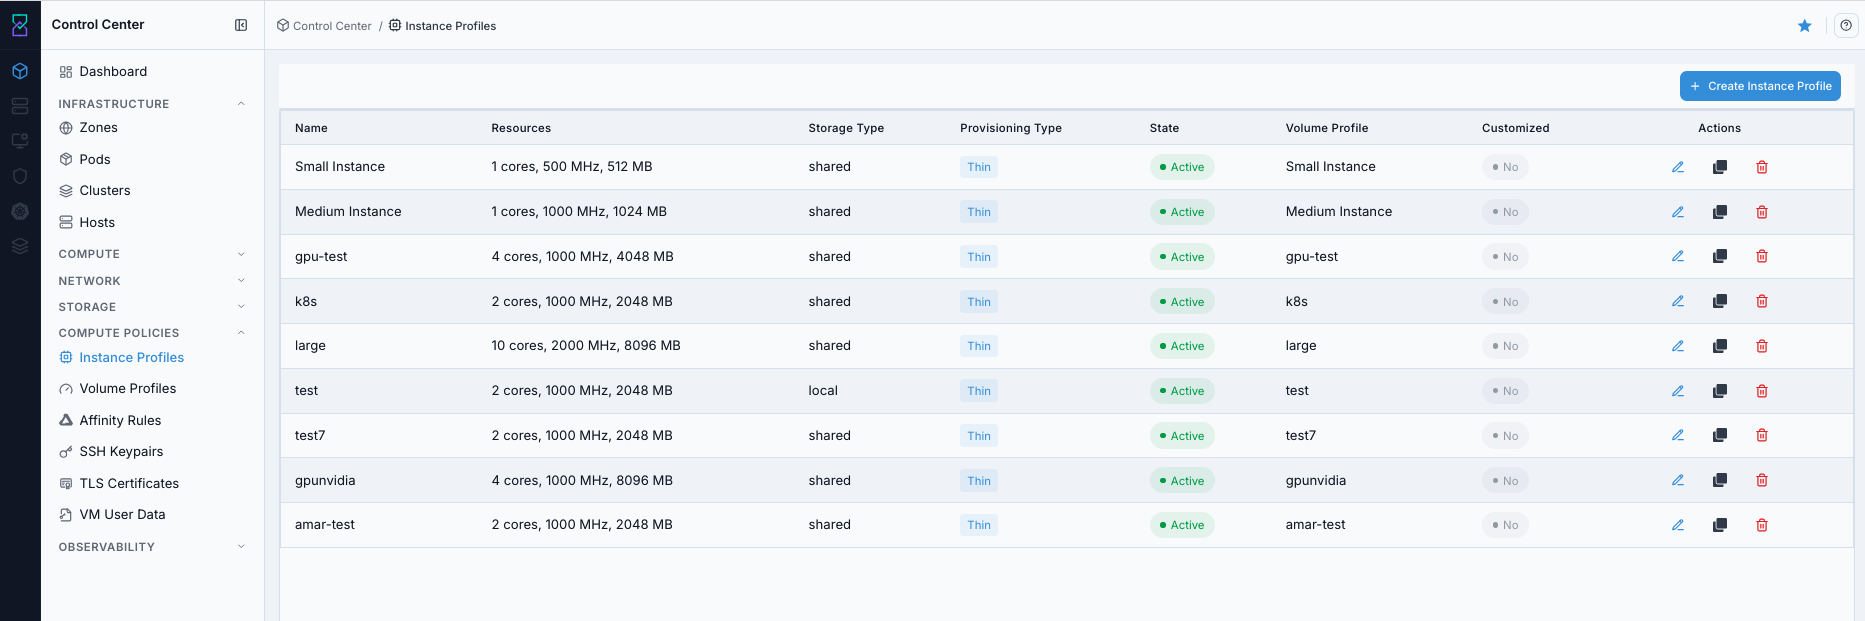
Instance Profiles dashboard.
Screen Overview and Actions
This screenshot shows the Instance Profiles dashboard table and the
+ Create Instance Profileentry point.From this screen, you can review active/inactive profile state, open profile details, create a new profile, and use row actions for existing profiles.
UI Area |
What to review |
|---|---|
Header and actions |
Page title, quick controls, and |
Table rows |
Existing profiles and their current state. |
Core columns |
|
Actions column |
Per-row edit/delete actions, based on permissions and dependency state. |
Expected Outcome:
You can identify the correct profile for the target VM workload.
If this fails:
Refresh the page and retry.
Verify account/domain scope and permissions.
Review the on-screen error message and retry.
Step: Open Instance Profiles Help Panel
When to Use: Use this when you need field definitions before creating or editing profiles.
Purpose: Get contextual guidance for the Instance Profiles page.
Steps:
Open
Control Center -> Compute Policies -> Instance Profiles.Click the help icon in the top-right corner.
Review page overview, field definitions, and action guidance.
Use the help definitions to confirm column meanings before create/edit actions.
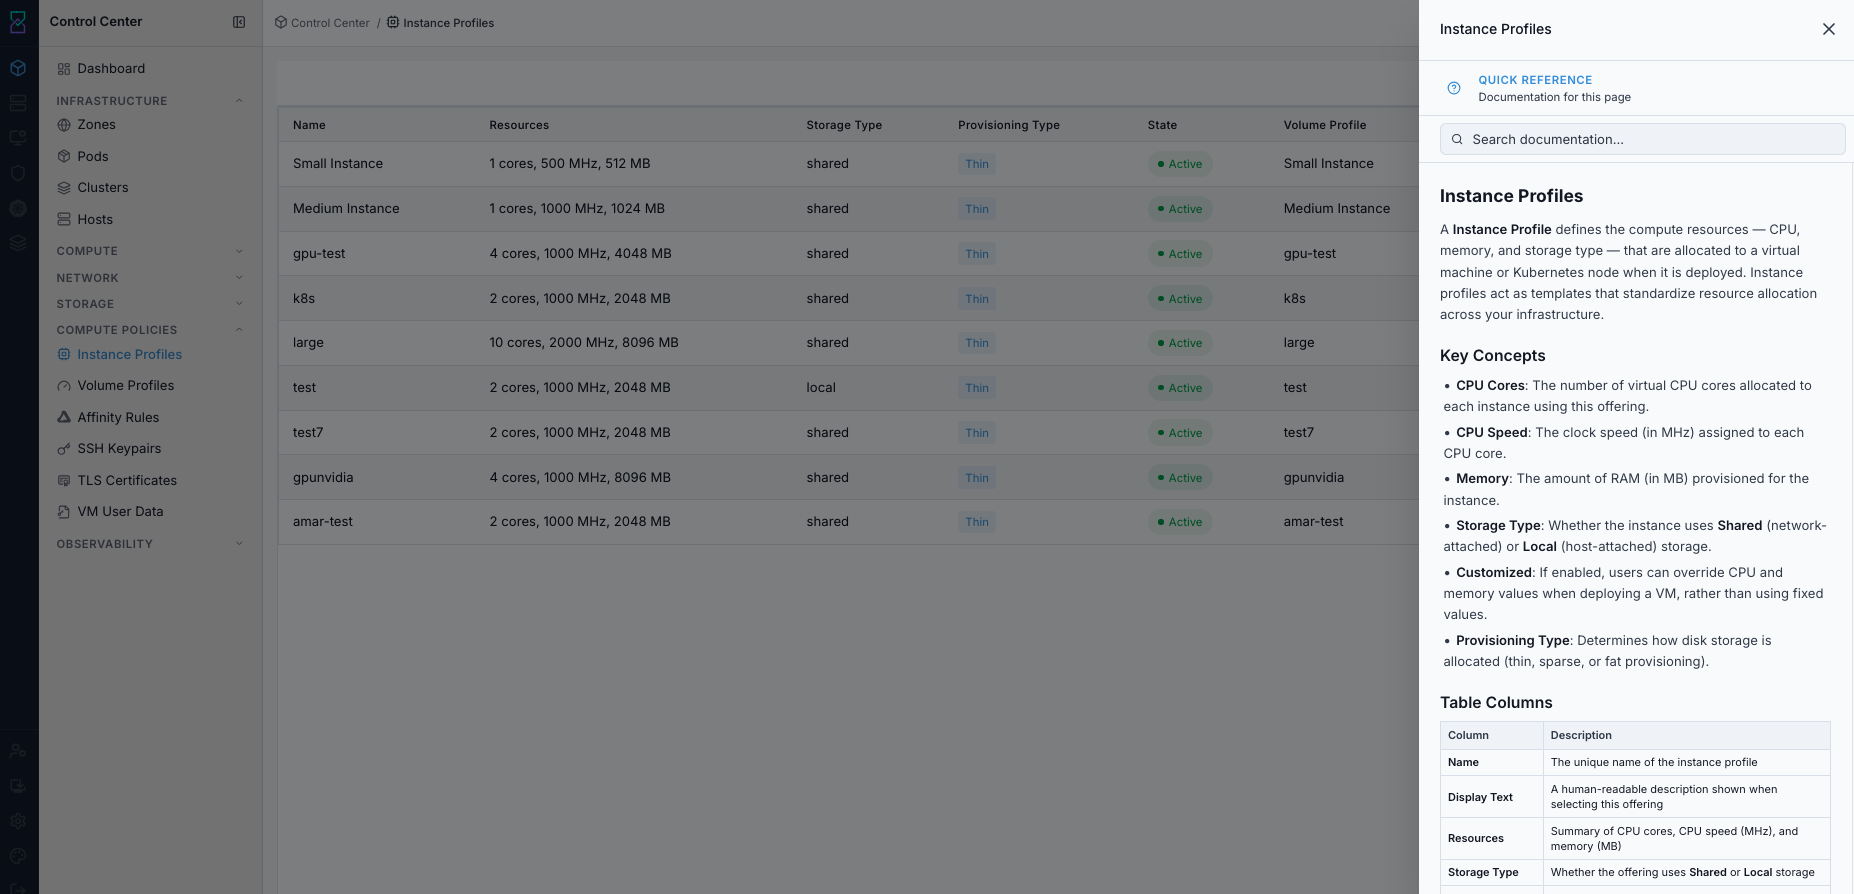
Instance Profiles help panel.
Screen Overview and Actions
This screenshot shows the page help panel for Instance Profiles.
Module overview and intended usage.
Column/field definitions for dashboard and forms.
Action guidance for create, edit, and delete behavior.
From this screen, you can confirm field meaning before changing profile configuration.
Expected Outcome:
Help panel opens with page-specific explanations.
If this fails:
Refresh the page and retry.
Verify browser popups/scripts are not blocked.
Review the on-screen error message and retry.
Step: Review Instance Profiles Actions
When to Use: Use this when you need to perform row-level operations on existing profiles.
Purpose: Validate available actions before making profile changes.
Steps:
In the Instance Profiles dashboard, open row actions for a target profile.
Review available operations such as edit and delete (availability depends on profile state and dependencies).
Choose only the required action.
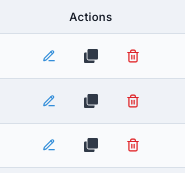
Instance Profiles row actions.
Screen Overview and Actions
This screenshot shows the row-level action menu for an instance profile.
From this screen, you can select edit/delete actions that are available for the selected profile state.
Expected Outcome:
Row actions are visible and correspond to profile lifecycle state.
If this fails:
Verify your role includes edit/delete permissions.
Confirm the profile is not locked by active dependencies.
Review the on-screen error message and retry.
Step: Create Instance Profile
When to Use: Use this when no suitable active compute profile exists for the required VM sizing policy.
Purpose: Create a reusable CPU/memory profile for consistent VM provisioning.
Steps:
Click
+ Create Instance Profile.Fill identity fields:
NameandDisplay Text.Set compute values:
CPU Cores,CPU Speed, andMemory.Set storage fields such as
Storage TypeandProvisioning Type.Set whether
Customizedis allowed.Optional: enable GPU passthrough and set
vGPU Profile,GPU Count, andGPU Display.Click
Create Instance Profile.Confirm the new profile appears in the dashboard.
Note
CPU and memory values are validated against current zone capacity. If entered values exceed available resources, the create operation is rejected until values are corrected.
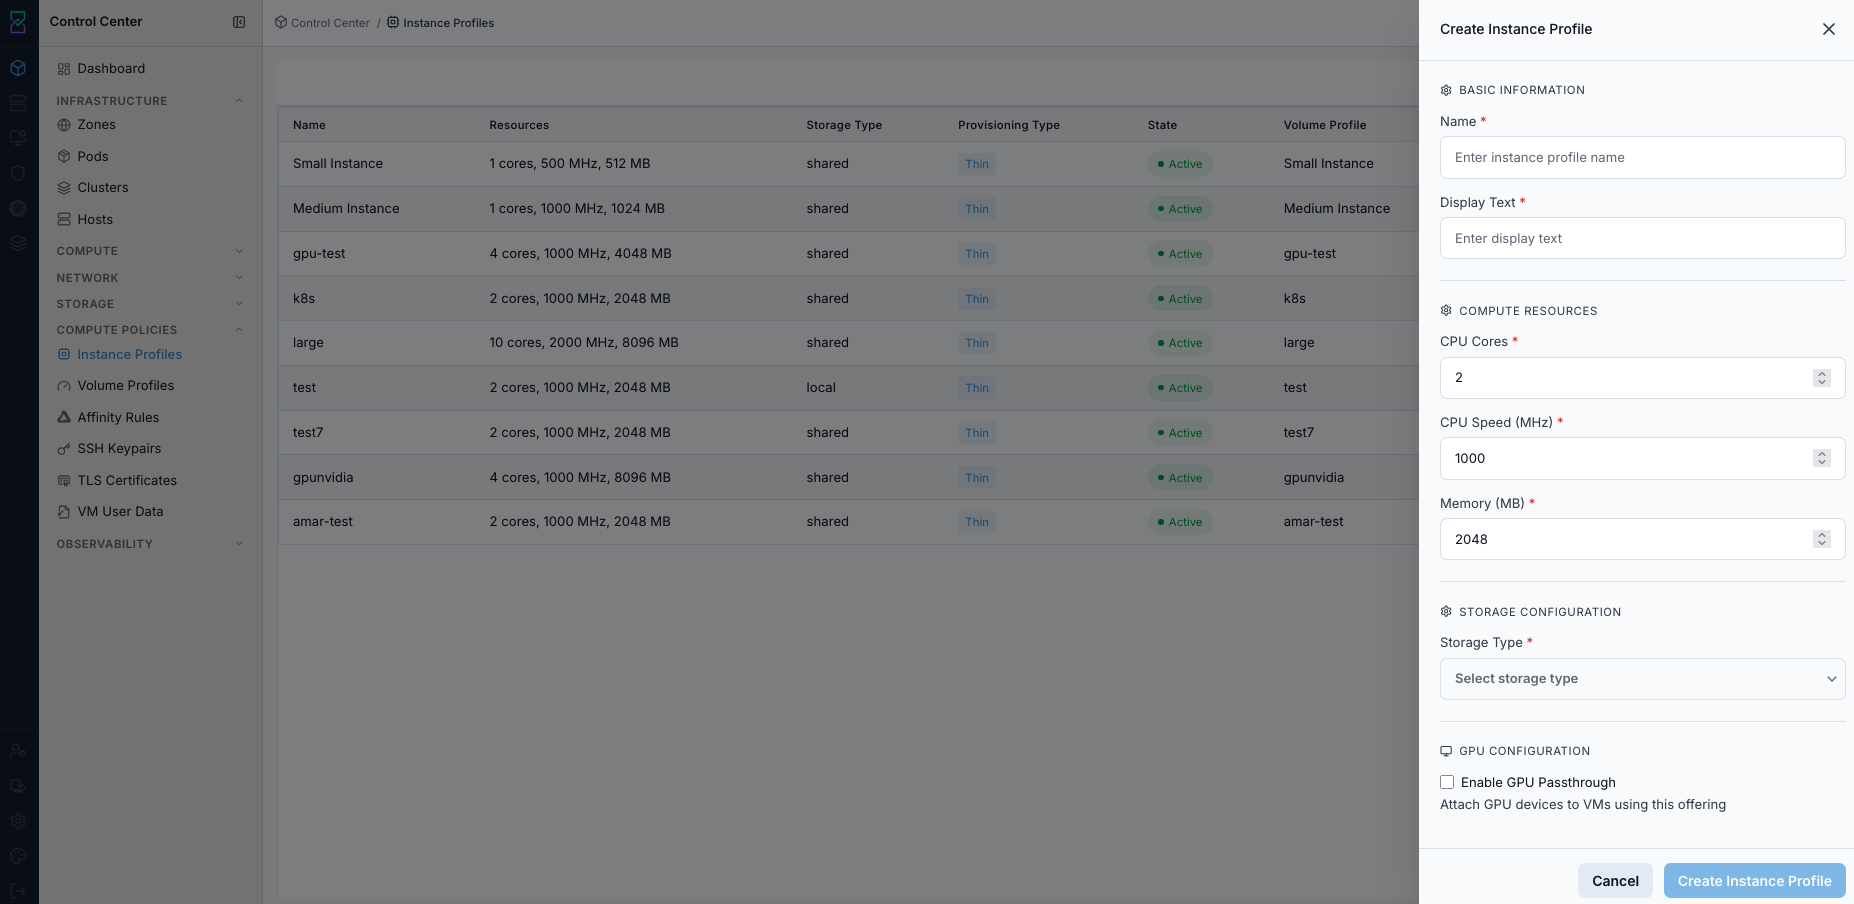
Create Instance Profile form.
Screen Overview and Actions
This screenshot shows the create form for a new instance profile.
From this screen, you can enter identity, compute, storage, and optional GPU settings, then save the profile.
Expected Outcome:
A new instance profile is created and available for VM provisioning.
If this fails:
Verify required fields and valid CPU/memory ranges.
Confirm profile name is unique in scope.
Review the on-screen error message and retry.
Step: Review Instance Profile Details
When to Use: Use this after create or before edit to review full profile configuration.
Purpose: Confirm compute profile values before use.
Steps:
Click a profile name from dashboard.
Review details cards for identity, compute resources, storage behavior, and placement configuration.
Confirm values match policy requirements.
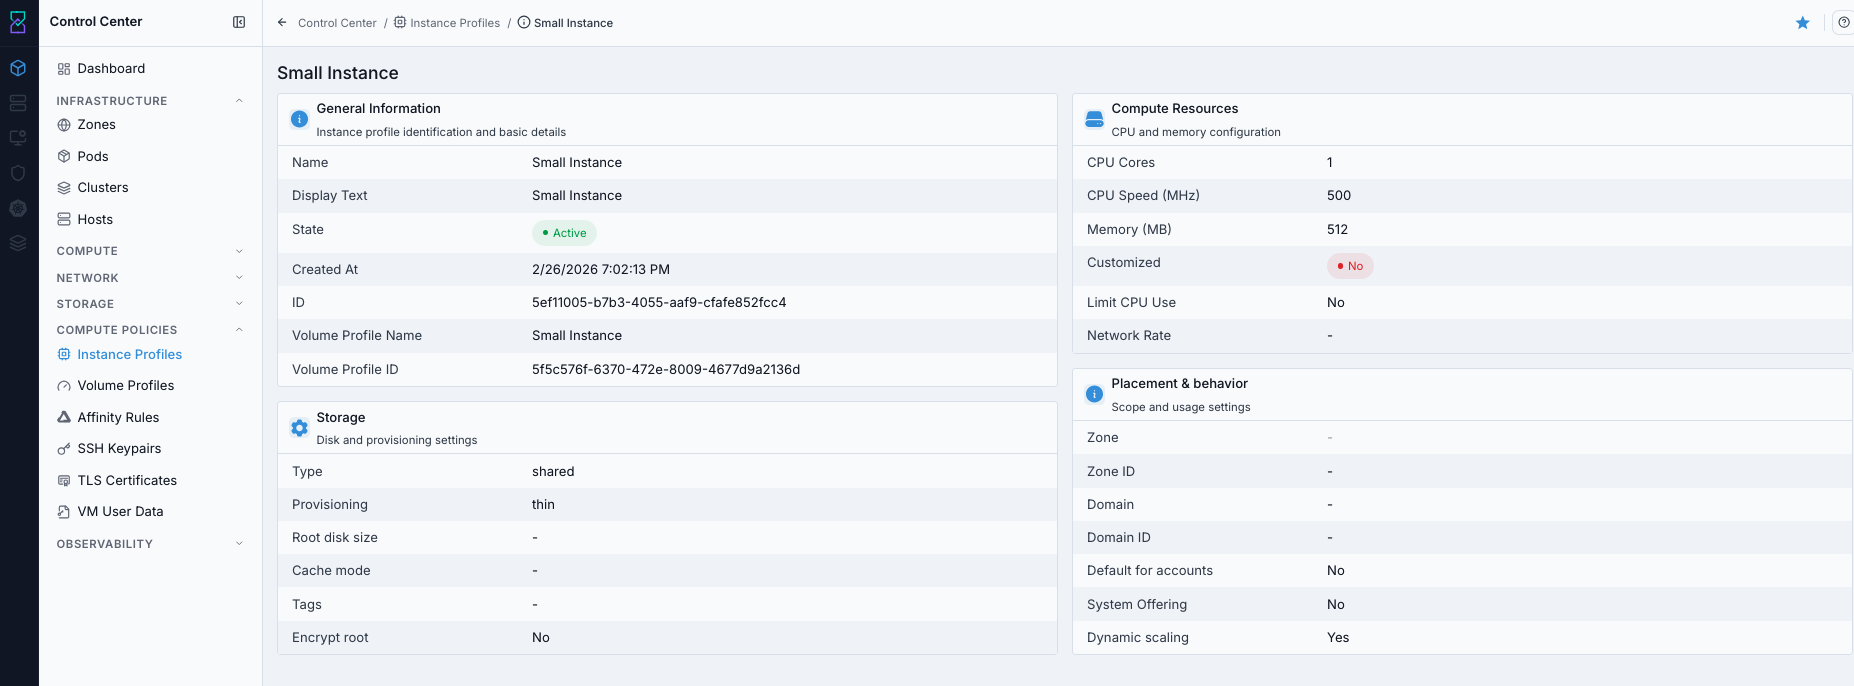
Instance Profile details page.
Screen Overview and Actions
This screenshot shows the details view for one instance profile.
From this screen, you can review current profile values and decide whether to keep or edit the profile.
Expected Outcome:
Profile details are reviewed against intended compute policy.
If this fails:
Refresh and reopen the details page.
Verify the profile still exists and is in visible scope.
Review the on-screen error message and retry.