File System
Path: Left sidebar > Storage > File System
The File System page manages a distributed POSIX-compatible shared filesystem that multiple clients can mount simultaneously.
CephFS File Systems
CephFS provides a POSIX-compatible distributed file system on top of Ceph. Each file system has a metadata pool and one or more data pools.
Use File System When You Need
Use File System When You Need |
Consider Alternatives When |
|---|---|
Shared directories for multiple servers at the same time |
Only one client needs access (local disk can be simpler) |
Traditional files/folders with POSIX permissions |
You need S3/Swift object workflows (use Object Storage) |
NFS mounts for Linux/Windows/macOS |
You need block-level access (use Block Storage) |
Kubernetes persistent storage via CSI |
- |
Key Components
Component |
What It Does |
Recommendation |
|---|---|---|
Metadata Pool |
Stores directories, filenames, permissions, inode metadata |
Use fast SSD-backed pool |
Data Pool |
Stores actual file content |
HDD-backed pools can be cost-efficient |
MDS (Metadata Server) |
Handles opens/listings/permissions and metadata operations |
Keep at least 1 active and 1 standby for failover |
Prerequisite Check
Before managing file systems:
At least one pool exists and is
active+clean.Prefer two pools: fast metadata pool + data pool.
If no pool exists, create one in Pools first.
Create File System (When Needed)
When to Use: Create a new file system when no existing file system matches the target workload.
Purpose: Provision a file system with a metadata pool and one or more data pools.
Steps:
Open
Storage > File System.Click
+ Create File System(if visible for your role).Enter file system
Name.Select
Metadata Pool.Select one or more
Data Pools.Submit the create action.
Verify the new file system row appears and expands correctly.
Confirm
Active MDSis present andStandby MDSis configured.
Expected Outcome:
New file system row is visible with mapped metadata/data pools.
MDS state converges to active/standby readiness.
If this fails:
Confirm selected pools exist and are
active+clean.Confirm role permissions include file system create actions.
Recheck MDS service health in Infrastructure > Services.
Current File System View (Screenshot)
The screenshot set for this page shows an existing file system already present. Values and names in the screenshot are reference examples only and can differ in your environment. In the shown UI:
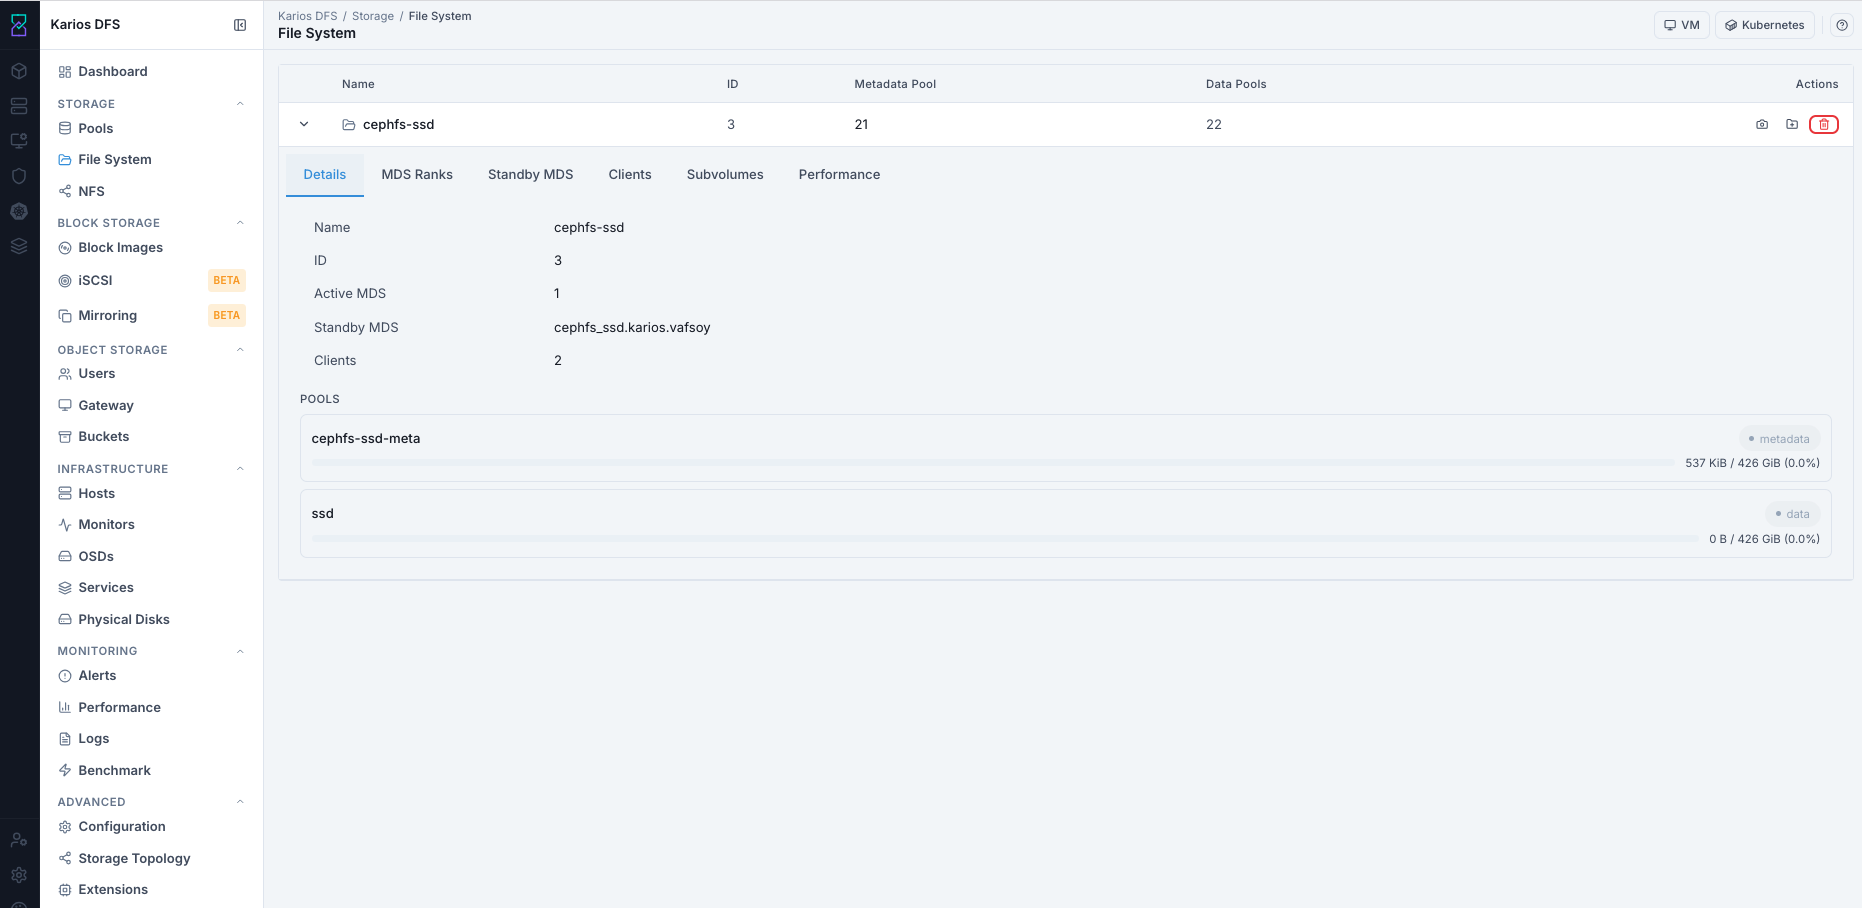
Current File System View with expanded row.
Open
Storage > File System.Select your existing file system row.
Click the row chevron
>to expand details.Use the tabs shown in the screenshot:
DetailsMDS RanksStandby MDSClientsSubvolumesPerformance
Expected state in the screenshot:
Active MDSis present.Standby MDSis present.Metadata and data pools are visible in the details area.
Warning
Ensure standby MDS exists. If no standby is shown, failover protection is missing.
How to View Existing File Systems
Open
Storage > File System.Review list columns: Name, ID, Metadata Pool, Data Pools.
Click row chevron
>to open detail tabs.
File System Detail Tabs
Values shown in screenshots in this section are reference examples only. Your environment will show different names, counts, throughput, and usage.
Table Columns
Column |
Description |
|---|---|
Name |
File system name |
ID |
Internal numeric identifier |
Metadata Pool |
The pool storing directory and inode metadata |
Data Pools |
Pools storing file content (can be multiple) |
Actions |
File system operations |
What You See
Tab |
Description |
|---|---|
Details |
Shows file system flags, creation time, enabled features, and quota configuration. |
MDS Ranks |
Active Metadata Server daemons with their rank, state, and current operation rate. |
Standby MDS |
MDS daemons in standby. These take over immediately if an active MDS fails. |
Clients |
Currently connected clients with address, mount path, and I/O statistics. |
Subvolumes |
Named sub-directories managed as independent storage units, used with Kubernetes CSI drivers. |
Performance |
MDS request rate, cache hits, and CephFS I/O throughput over time. |
Pool Usage
The progress bars in the detail panel show usage as a percentage of each pool’s configured quota. When a pool hits its quota, writes to that pool are blocked.
Best-Practice Target Ranges (Reference)
Signal |
Target Range |
Action Trigger |
Reference |
|---|---|---|---|
Active MDS |
|
If |
|
Standby MDS |
|
If none, add standby for failover protection |
|
Metadata Pool Usage |
Keep below |
At or above |
|
Data Pool Usage |
Keep below |
At or above |
|
MDS Rank State |
Single-Active Setup: Rank |
Persistent non-active ranks require service validation |
|
Clients Before Maintenance |
|
If non-zero, coordinate unmount or evict stale sessions |
|
Related Pool PG Status |
|
If non-clean persists, stop changes and investigate |
Details Tab
What You See: This is the primary summary tab for the selected file system. It combines file system identity, active/standby MDS readiness, client count, and metadata/data pool usage into one view.
Details Tab Description (Quick Read)
Use this tab as the primary health summary for the selected file system. It shows identity, MDS readiness, client presence, and pool usage state in one place.
Field |
What It Means |
What To Validate |
|---|---|---|
Name |
File system display name. |
Confirm it matches the target file system. |
ID |
Internal numeric identifier. |
Confirm the ID is consistent for the same file system across checks. |
Active MDS |
Number of active metadata daemons serving requests. |
Confirm at least one active MDS is present. |
Standby MDS |
Standby metadata daemon used for failover. |
Confirm at least one standby entry is present. |
Clients |
Current client connection count. |
Before maintenance, target connected clients is |
Pools (Metadata/Data Bars) |
Usage state of metadata and data pools. |
Keep usage in safe range and act before high utilization. |
Check:
Active MDS >= 1
Standby MDS present
Metadata/Data pool usage bars (plan expansion before 80%)
Note
Use the Current File System View screenshot shown earlier in this page for this same details-tab validation.
Warning
A full metadata pool can block writes even if data pool still has space.
MDS Ranks Tab
What Is An MDS Rank?
An MDS rank is a logical metadata-serving slot in CephFS.
Each active MDS daemon owns a rank and serves metadata operations for that rank.
In most smaller deployments, only rank 0 is active.
In larger multi-active deployments, multiple ranks can be active to distribute
metadata load.
What You See: This tab shows active MDS rank assignments and runtime state for metadata serving. It helps you verify that the namespace service is actively running.
MDS Ranks Tab Description (Quick Read)
Use this tab to verify active metadata-serving daemons. It shows active MDS daemons with their rank, state, and current operation rate.
In single-active deployments, rank
0should beactive.In multi-active deployments, all configured ranks should be
active.Short non-active transitions can occur during failover or restart.
Persistent non-active ranks indicate an MDS service or cluster health issue.

MDS Ranks tab.
Standby MDS Tab
What You See: This tab lists standby MDS daemons that are ready to take over if an active MDS fails. It is your immediate failover-readiness view.
Standby MDS Tab Description (Quick Read)
Use this tab to confirm standby readiness. It lists MDS daemons in standby, which take over immediately if an active MDS fails.
At least one standby entry should be visible.
Empty standby tab means no automatic failover.

Standby MDS tab.
Clients Tab
What You See: This tab shows currently connected clients using the file system. Use it to confirm active usage before maintenance or disruptive operations.
Clients Tab Description (Quick Read)
Use this tab to review current client sessions. It shows connected clients with address, mount path, and I/O statistics.
Validate These Fields:
Client Address: Confirm each client IP/host is expected.
Mount Path: Confirm clients are mounted to intended export or path.
I/O Statistics: Confirm read/write activity matches expected workload behavior.
Shows connected clients count.
Before maintenance, target connected clients =
0.Use Evict only for stale or crashed clients.

Clients tab.
Subvolumes Tab
What You See: This tab lists managed subvolumes under the file system. Subvolumes are isolated paths used for per-team or Kubernetes-backed storage units with independent quota/snapshot behavior.
Subvolumes Tab Description (Quick Read)
Use this tab to view managed subvolumes. Subvolumes are named sub-directories managed as independent storage units and are used with Kubernetes CSI drivers.
Shows created subvolumes (name/path/quota/usage).
Empty list is valid when none are created.
File-system snapshots are visible in
.snapon mounted clients.

Subvolumes tab.
Performance Tab
What You See: This tab displays time-series performance indicators for CephFS activity, including metadata request load and client read/write behavior.
Performance Tab Description (Quick Read)
Use this tab for trend-based performance checks. It shows MDS request rate, cache hits, and CephFS I/O throughput over time.
Shows live metrics such as:
MDS request rate
client read/write ops
read throughput
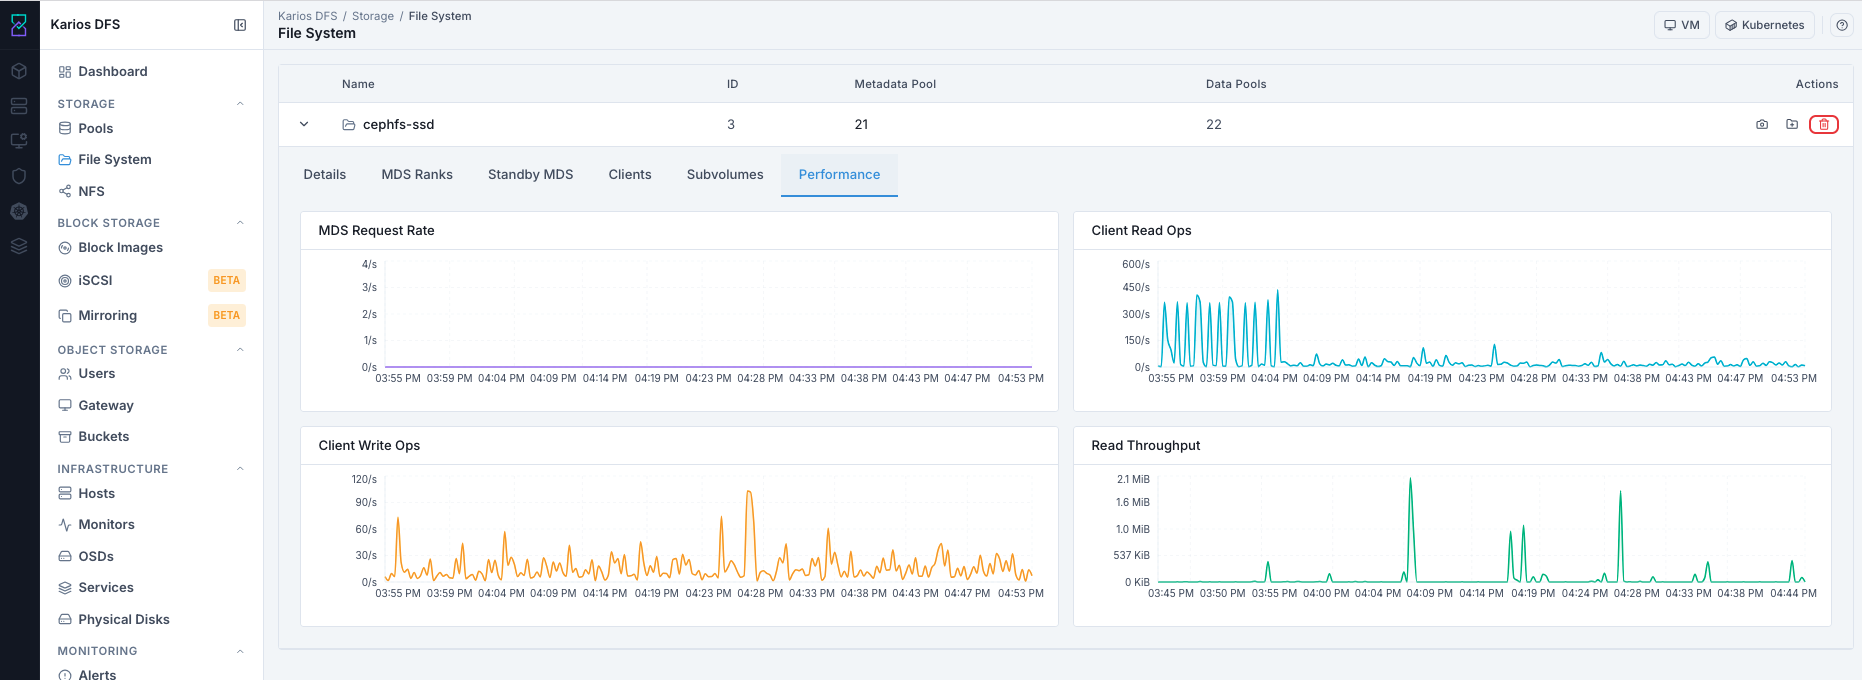
Performance tab.
Sustained high MDS request rate can indicate metadata bottlenecks.
Common Tasks
Mount CephFS: Clients can mount with the kernel driver (
mount -t ceph) or FUSE (ceph-fuse). Both require a keyring and monitor addresses.Create A Snapshot: Right-click a subvolume to snapshot it. In some UI variants, the same action is exposed by a camera icon on the file system row. Snapshots are crash-consistent and near-instant.
Set A Quota: Apply a size or file-count limit to a directory. Quotas are enforced by the MDS and respected by all clients.
Evict A Client: Use the
Clientstab to forcibly disconnect a misbehaving or stale client.
Key Concepts
MDS (Metadata Server): Handles file system namespace operations (open, stat, readdir). One active MDS handles a file system by default. Multiple active MDS ranks are possible for large deployments.
Subvolumes: Self-contained sub-trees with their own snapshots and quotas. Kubernetes provisioners create one subvolume per PersistentVolume.
Standby-replay: An MDS in standby-replay continuously tails the active MDS journal, enabling near-instant failover.
File System Row Actions
Action Decision Guide (Why, Impact, When To Act)
Action |
Why User Does This |
Impact |
When To Do It |
|---|---|---|---|
Expand File System Row |
Validates MDS state, pool usage, clients, and runtime health tabs. |
Reduces operational risk before running maintenance or exposing data. |
Do this at the start of daily checks and before any destructive action. |
Create Snapshot |
Captures a rollback point before risky changes. |
Adds restore point with minimal immediate space usage. |
Do this before bulk delete, upgrade, migration, or config change. |
Create Subvolume |
Separates workload or team data with optional quota controls. |
Improves data organization and enforces per-workload limits. |
Do this when onboarding new teams/apps or setting storage boundaries. |
Evict Client |
Removes stale or crashed client sessions blocking operations. |
Drops client access immediately for the selected client session. |
Do this only for stale sessions, not for active user workflows. |
Delete File System |
Decommissions a filesystem no longer required. |
Permanently destroys all filesystem data; dependent exports break. |
Do this only after exports are removed and backups are validated. |
Action 1 - Create Snapshot
Use the snapshot entry point available in your UI:
If camera icon is visible on the file system row, click it.
If subvolume context menu is used in your UI, right-click the target subvolume and choose snapshot.
Snapshot is created immediately.
Verify from mounted client:
ls /mountpoint/.snap/
Note
.snap is a virtual directory managed by MDS, not a separate UI list item.
Action 2 - Create Subvolume (Folder+)
Click folder-plus icon.
Fill fields using your environment-specific values and submit.
Field |
Value / Options |
Description |
|---|---|---|
Name |
Text |
Required unique name within filesystem |
Size |
Example: |
Optional quota cap for subvolume |
Pool |
Dropdown |
Data pool for subvolume content |
Action 2.1 - Set Quota (Directory Or Subvolume)
Open the location where quota controls are available in your UI:
Subvolume create/edit flow for subvolume quota.
Directory quota controls where directory-level quotas are exposed.
Set quota values:
Size limit for capacity control.
File-count limit where supported by your deployment.
Save changes and verify effective quota in Details/Subvolumes view.
Note
Quotas are enforced by the MDS and apply consistently to all clients.
Action 3 - Delete File System (Red Trash)
Warning
Deletion is permanent and irreversible.
Before deleting:
Remove dependent NFS exports.
Ensure no active clients.
Confirm backup is complete.
After deletion:
Filesystem row is removed.
All filesystem data is destroyed.
Underlying pools remain and must be deleted separately if no longer needed.
Native File System Mount (Non-NFS)
In Linux-only environments, native client mounts can provide better performance than NFS.
Prerequisites:
Cluster configuration file available on client
Valid authentication keyring
Network reachability to monitor IPs (for example, port 6789)
Example kernel mount:
mount -t ceph <monitor-ip>:6789:/ /mnt/myshare -o name=admin,secretfile=/etc/ceph/admin.secret
Mount specific path/subvolume:
mount -t ceph <monitor-ip>:6789:/volumes/<subvolume-path> /mnt/myshare -o name=admin,secretfile=/etc/ceph/admin.secret
Warning
Do not pass CephFS secrets directly on the command line with
secret=<key>. Command-line secrets can be exposed in process listings.
Use secretfile= with a protected file instead.
Secure key handling:
chmod 600 /etc/ceph/admin.secret
Note
Use environment-specific monitor IPs and credentials provided by your administrator.
Troubleshooting - File System
Problem |
Most Likely Cause |
What to Do |
|---|---|---|
No active MDS in MDS Ranks |
MDS daemon down |
Check |
Clients cannot mount (permission denied) |
Client auth/config mismatch |
Verify client config file and keyring |
Metadata pool usage above 80% |
Metadata pool nearing full |
Expand quota/capacity before write impact |
MDS reconnect state persists |
Stale client sessions |
Wait reconnect timeout or evict stale clients |
Standby MDS empty |
Single-host MDS deployment |
Deploy MDS on at least two hosts |
Writes fail with free data pool |
Metadata pool quota full |
Increase metadata pool quota/capacity |
Snapshot not visible in UI tab |
Snapshot is under virtual |
Mount filesystem and list |
Delete blocked by dependency |
Active NFS export references filesystem |
Remove exports in |
Note
If issues persist, open a support ticket via Alerts workflow or Karios Support.