Volume Profiles
New User Start
What Is a Volume Profile?
A volume profile defines storage behavior for VM-attached volumes, including storage tier, performance controls (IOPS/QoS), and custom-size policy. It standardizes how storage is provisioned across teams and workloads.
Start Here
Open
Control Center -> Compute Policies -> Volume Profiles.Continue to the detailed steps below.
Quick and Important Information
Key Concepts
Storage Capacity: Volume size that can be provisioned (GB).Storage Type: Tier classification (for example SSD, HDD, tier-1, tier-2).IOPS: Input/output operations per second performance metric.Throughput: Data transfer rate for storage operations.Customized Size (Custom Size): Whether users can specify custom volume sizes instead of fixed offering sizes.QoS: Quality-of-service controls for predictable performance.Write Cache Type (Cache): Write-caching behavior used for volume I/O.Provisioning Type: How storage is allocated (thin, sparse, or fat).
Table Columns
Column |
Description |
|---|---|
Display Text |
Human-readable name of the volume profile. |
Storage Type |
Storage tier or classification. |
Custom Size |
Whether users can choose custom volume sizes. |
IOPS |
Performance rating in operations per second. |
Min IOPS |
Minimum guaranteed IOPS. |
Max IOPS |
Maximum allowed IOPS. |
State |
Whether the profile is |
Actions |
Edit or delete the volume profile. |
Write Cache Type
Shown as
Cachein the volume profile configuration/details view.Controls write-caching behavior for storage I/O.
Available values depend on storage backend and hypervisor support.
Provisioning Types
Thin: Storage is allocated on demand.Sparse: Similar to thin provisioning behavior.Fat: Full storage is pre-allocated upfront.
Actions
Create: Click
+ Create Volume Profileand completeBasic Information,Configuration, andAdvanced Options.Edit: Use the pencil icon to update display text, IOPS settings, and related fields.
Delete: Use the trash icon and confirm deletion (blocked if active volumes still depend on the profile).
Tip
Use multiple volume profiles to tier storage by performance requirements.
Tip
Apply storage tags consistently so the system can match volumes to appropriate storage pools.
Warning
Set Min IOPS for baseline performance and Max IOPS to prevent a single VM from consuming all storage resources.
Warning
You cannot delete a volume profile that has active volumes attached.
Step: Review Volume Profiles Dashboard
When to Use: Use this first when validating existing volume policy profiles.
Purpose: Understand current volume profile inventory and active states.
Steps:
Open
Control Center -> Compute Policies -> Volume Profiles.Review the table columns and current state values shown in the dashboard.
Identify baseline profile(s) for standard volume requests.
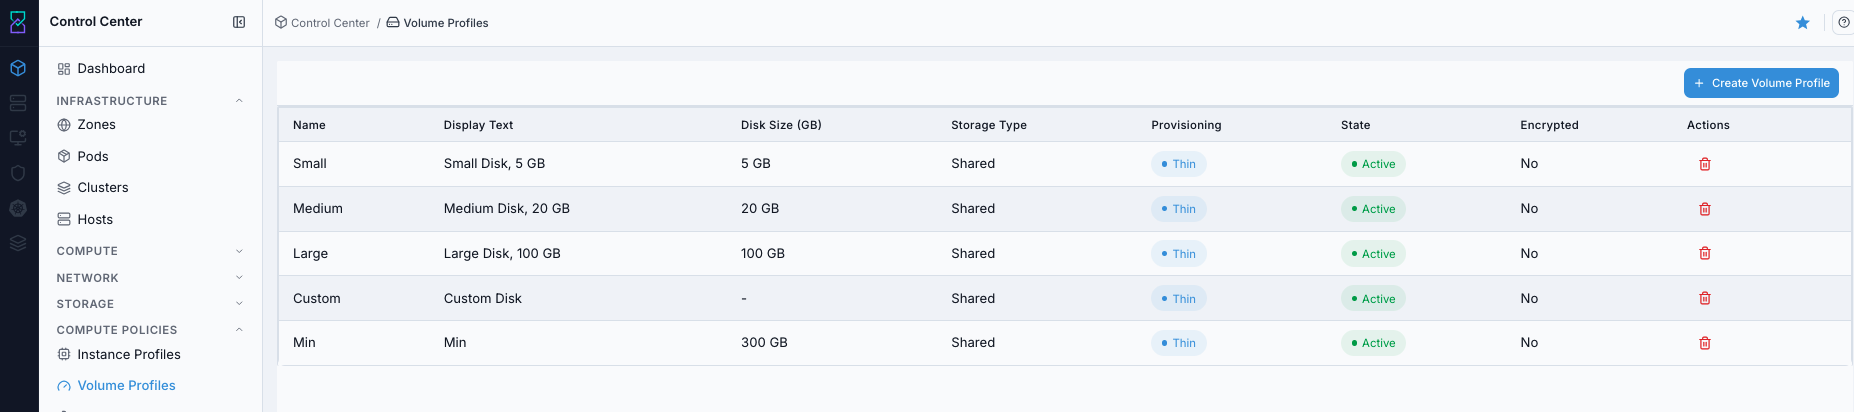
Volume Profiles dashboard.
Screen Overview and Actions
This screenshot shows the main Volume Profiles table and the
+ Create Volume Profilebutton.The table lists each profile with
Display Text,Storage Type,Custom Size,IOPS,Min IOPS,Max IOPS, andState.From this screen, you can:
Open profile details by clicking the profile row/name.
Create a new profile with
+ Create Volume Profile.Use row actions to edit or delete an existing profile.
Expected Outcome:
You can identify available profiles for standard and specialized volume workflows.
If this fails:
Refresh and retry.
Confirm required fields and actions are visible on the page.
Review the on-screen error message and retry.
Step: Open Volume Profiles Help Panel
When to Use: Use this before profile edits when field behavior is unclear.
Purpose: Get contextual definitions for Volume Profiles fields and actions.
Steps:
Open
Control Center -> Compute Policies -> Volume Profiles.Click the help icon in the top-right corner.
Review field definitions and usage guidance.
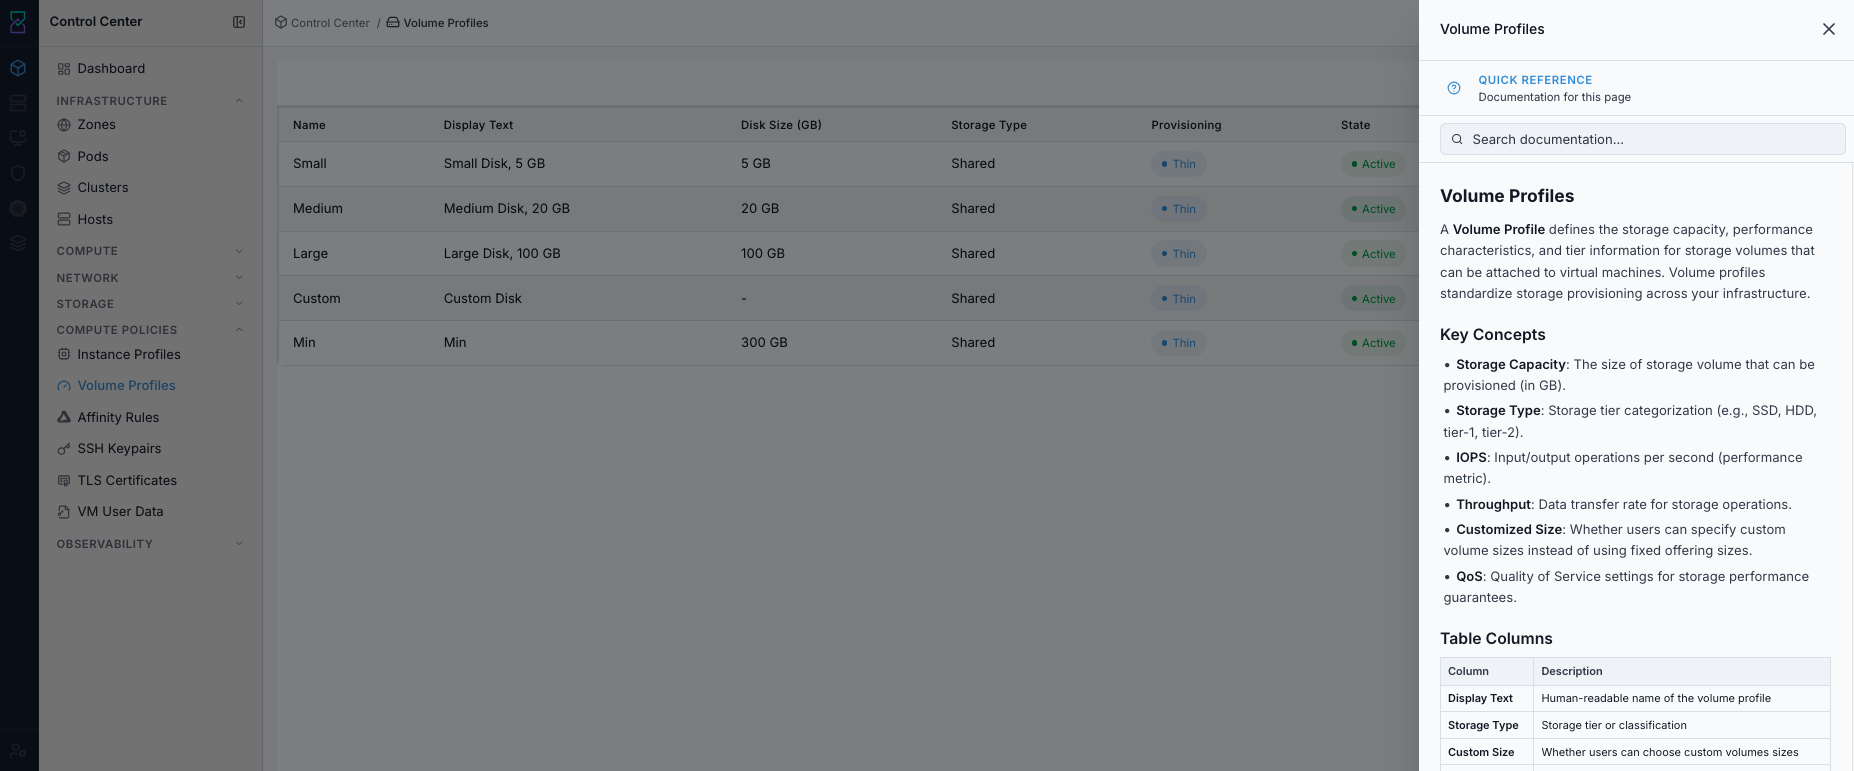
Volume Profiles help panel.
Screen Overview and Actions
This screenshot shows the Volume Profiles help panel for this page.
The help panel provides definitions for table columns, form fields, and available actions.
From this screen, you can:
Confirm what each dashboard field means before making changes.
Validate expected behavior for create, edit, and delete actions.
Expected Outcome:
Help panel opens with page-specific guidance.
If this fails:
Refresh and retry.
Verify browser/script restrictions are not blocking the panel.
Review the on-screen error message and retry.
Step: Create Volume Profile
When to Use: Use this when no existing profile matches required storage policy.
Purpose: Create a reusable profile for consistent volume provisioning.
Steps:
Click
+ Create Volume Profile.In
Basic Information, setDisplay TextandStorage Type.In
Configuration, setCustom Size,Min IOPS, andMax IOPS.In
Configuration, setCache(write cache type) andProvisioning Typeas needed.In
Advanced Options, setQoS,Tags, andEncryptionas needed.Save the profile.
Confirm the new profile appears in dashboard rows.
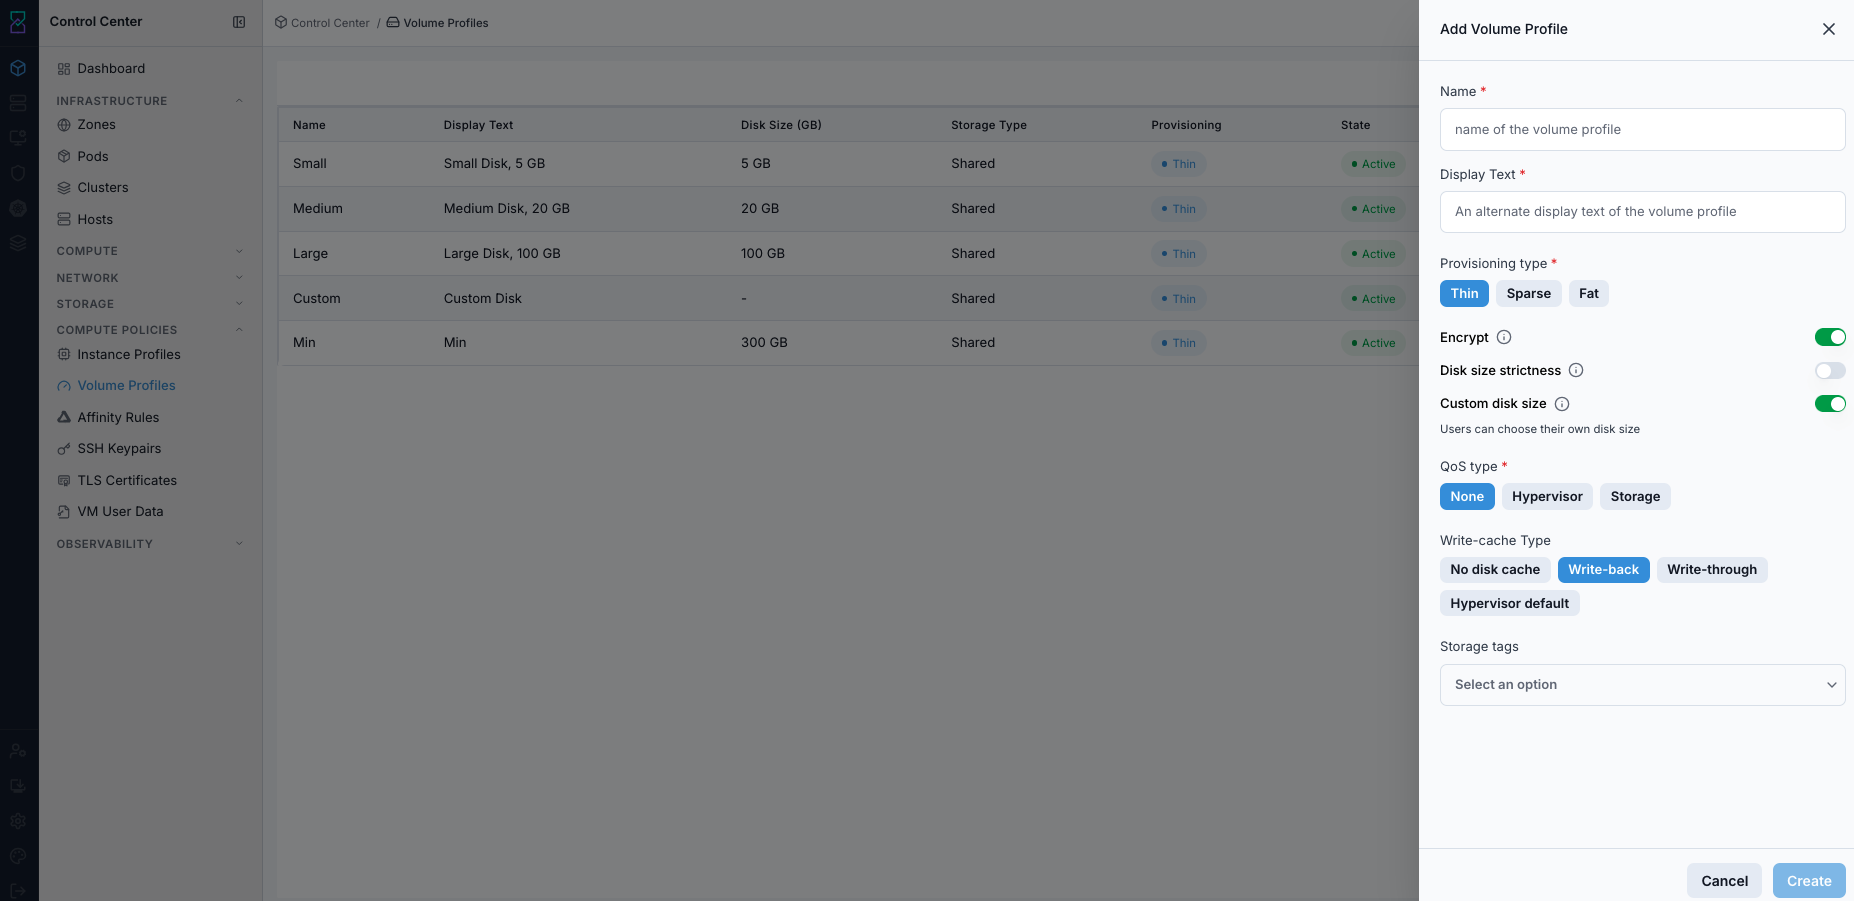
Create Volume Profile form.
Screen Overview and Actions
This screenshot shows the
Create Volume Profileform.The form is split into
Basic Information,Configuration, andAdvanced Options.From this screen, you can:
Enter required profile values.
Set performance and policy options, including
CacheandProvisioning Type.Save to create a reusable volume profile.
Expected Outcome:
New volume profile is created and available in volume creation workflows.
If this fails:
Validate required fields and unique naming.
Verify storage-policy values are supported in the target scope.
Review the on-screen error message and retry.
Step: Review Volume Profile Details
When to Use: Use this after create or before update to review full profile configuration.
Purpose: Confirm profile behavior and policy values from details view.
Steps:
Click a volume profile name to open details.
Review details sections for general profile identity, storage/performance configuration, and advanced options.
Confirm
Cache(write cache type),Provisioning Type, and IOPS values match policy intent.Validate values before any update.
If changes are needed, continue to the update action from details.
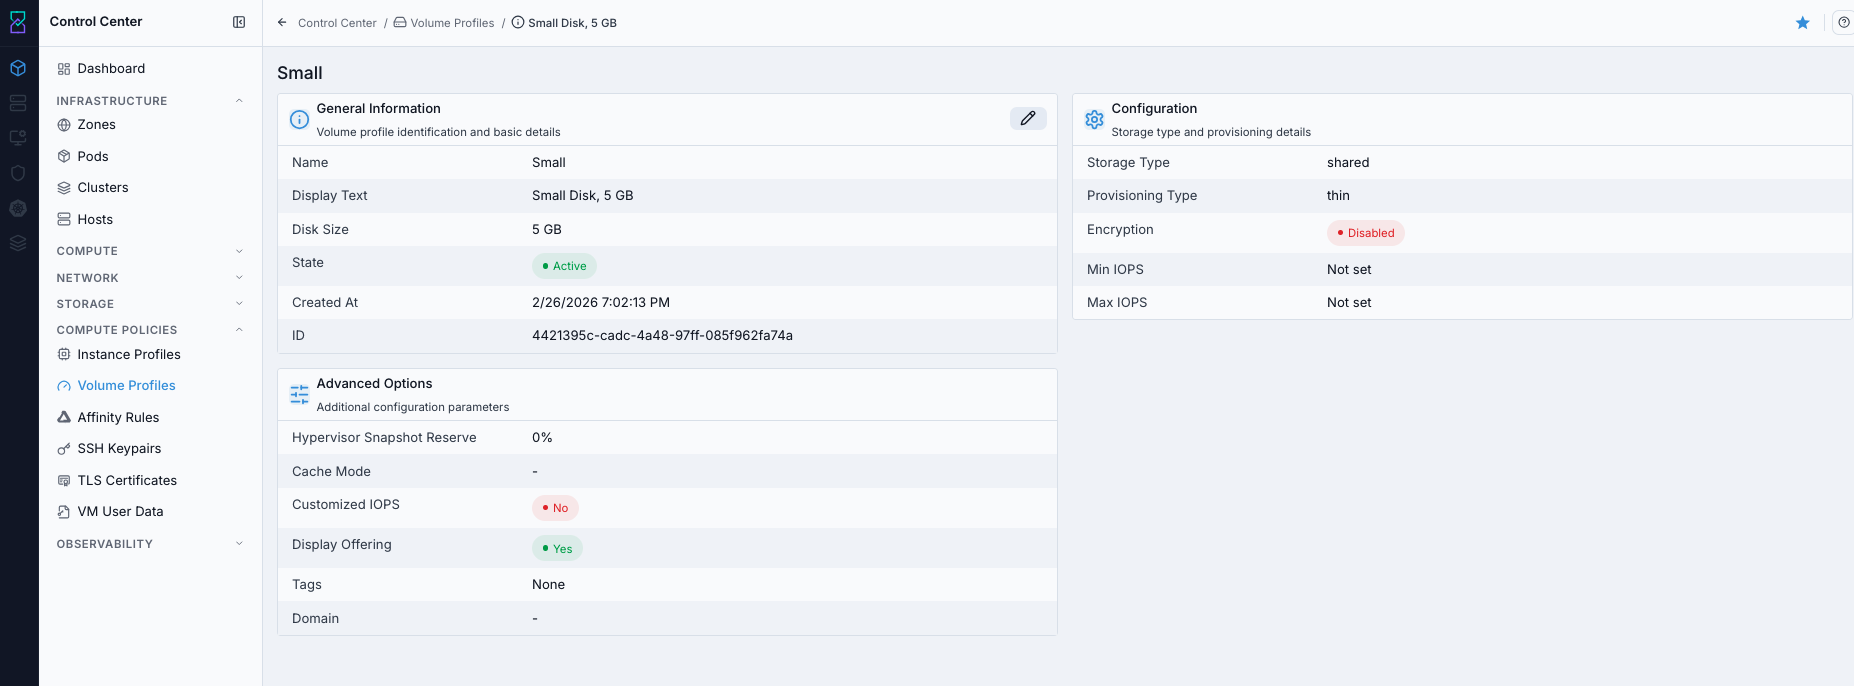
Volume Profile details page.
Screen Overview and Actions
This screenshot shows the Volume Profile details page for one profile.
The details view shows the current profile configuration across identity, configuration, and advanced sections.
From this screen, you can:
Verify active policy values before use.
Verify
Cache(write cache type),Provisioning Type, and IOPS settings before updates.Open the update/edit action from details when changes are required.
Detail Sections and Field Meaning
Section |
What this section contains |
|---|---|
General Information |
|
Configuration |
|
Advanced Options |
|
How to Read This Page
Use
General Informationto confirm you opened the correct profile.Use
Configurationto review performance and write behavior before assigning the profile.Use
Advanced Optionsto review scope, placement tags, and encryption policy.
Expected Outcome:
Detail values are verified and ready for updates or workflow validation.
If this fails:
Refresh and reopen details.
Verify profile visibility in current scope.
Review the on-screen error message and retry.
Step: Update Volume Profile from Details
When to Use: Use this when an existing profile needs policy adjustments.
Purpose: Apply updates without recreating the profile.
Steps:
Open a profile details page.
Click the update/edit action.
Change required fields (for example
Min IOPS,Max IOPS,Cache, orProvisioning Type) and save.Confirm updated values are reflected in details/dashboard.
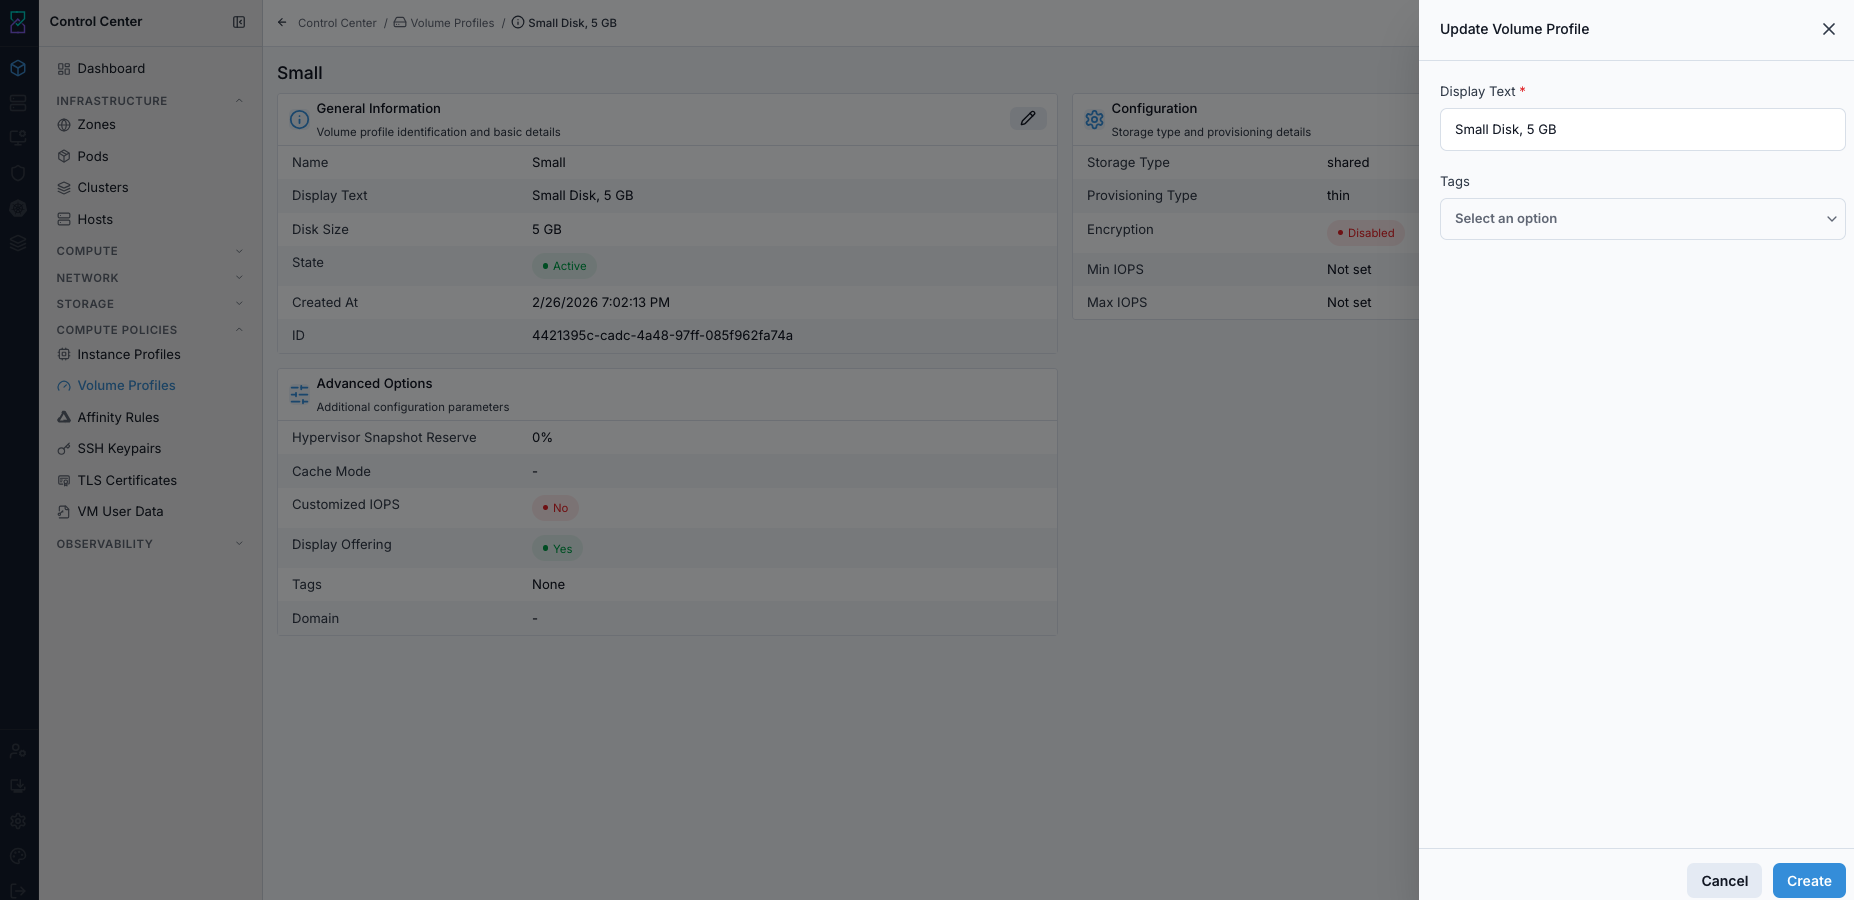
Update Volume Profile form.
Screen Overview and Actions
This screenshot shows the update form launched from the profile details page.
Existing values are prefilled so you can adjust only the fields that need changes.
From this screen, you can:
Update allowed profile values.
Save and return to details/dashboard to review applied changes.
Expected Outcome:
Updated profile values are persisted and visible in subsequent workflows.
If this fails:
Verify field values meet form rules.
Confirm the profile can be updated from the current page.
Review the on-screen error message and retry.