Block Images
Path: Left Sidebar > Block Storage > Block Images
When to Use:
When provisioning, snapshotting, cloning, or retiring RBD-backed virtual disks.
When validating image configuration or RBD performance before attaching workloads.
Purpose:
This page explains the complete block-image workflow from image creation through snapshots, namespaces, trash handling, and performance review.
Steps:
Open
Block Storage > Block Images.Select the tab that matches the workflow you need.
Use the create flow or row actions for the target image.
Validate the resulting image state, snapshots, or performance after the action.
Expected Outcome:
You can complete the required block-image task and confirm the image is ready for the next workflow.
What You See:
Tabs for images, namespaces, trash, and overall performance, plus image detail tabs and row actions.
What This Screenshot Shows:
The screenshots on this page show the reference create-image flow, image detail tabs, snapshot views, trash handling, and overall performance screens.
Actions in This Screen:
Create images.
Expand rows to inspect image details and snapshots.
Use row actions for clone, flatten, move to trash, restore, or purge workflows.
If this fails:
Confirm the target pool is healthy and tagged for
rbd.Check snapshot or clone dependencies before deleting or flattening.
Re-open the image row after the backend task completes before taking the next action.
Block Images Overview
RBD (RADOS Block Device) images are thin-provisioned block devices backed by a Ceph pool. They can be attached to VMs or mounted as volumes.
In this page you perform the full user workflow:
Create and manage images.
Validate image details and features.
Create snapshots and clones.
Flatten dependent clones when required.
Manage namespaces.
Restore or purge from trash.
Monitor per-image and cluster-wide performance.
Tabs
Tab |
Description |
|---|---|
Images |
Lists all RBD images with size, status, and snapshot counts. |
Namespaces |
Manage RBD namespaces for isolating images within a pool. |
Trash |
Soft-deleted images pending permanent removal. |
Overall Performance |
Cluster-wide RBD read/write IOPS and throughput charts. |
Prerequisite Check Before You Create Images:
Confirm at least one pool is healthy in
Storage > Pools.Confirm that pool has
Application = rbd.If no
rbdpool exists, create or edit a pool first.Confirm your role can create images (the
+ Create Imagebutton is visible and enabled).
Warning
If + Create Image is missing or disabled, resolve role/permission first
before proceeding with image workflows.
Images Tab
Path: Block Storage > Block Images > Images
Table Columns
Core terminology:
Column |
Description |
|---|---|
Name |
Image name. |
Pool |
The Ceph pool storing this image. |
Size |
Provisioned (virtual) size of the image. |
Status |
Current state (OK, degraded, migrating). |
Snapshots |
Number of snapshots taken from this image. |
Features |
Enabled RBD features (layering, exclusive-lock, fast-diff, etc.). |
Format |
Image format (always format 2 for modern images). |
Some environments also show additional columns (for example Namespace, Objects, Object Size, Provisioned). Those are valid UI variations.
How To Create An RBD Image
Purpose:
To provision a virtual disk for a VM or application workload.
When to Use:
Before attaching storage to a new VM.
When an existing VM or workload needs a new disk.
When creating baseline template images for cloning.
Steps:
Open
Block Storage > Block Images.Click
+ Create Image. The Create RBD Image panel opens.In Name *, enter the image name.
In Pool *, select the target pool.
In Size (GiB), enter the virtual disk size.
In Features, select checkboxes based on workload policy:
layering,striping,exclusive-lock,object-map,fast-diff.Review required fields and click Create Image.
Create Form Fields (As Displayed In UI):
Field |
What User Enters/Selects |
Why It Matters |
|---|---|---|
|
Image name |
Identifies the disk in image operations and VM attach flows. |
|
Target pool |
Determines where image data is stored and what pool policy applies. |
|
Numeric size in GiB |
Sets virtual capacity presented to VM/workload. |
|
Feature checkboxes |
Controls clone, lock, and diff behavior for this image. |
Feature Selection Guide (New User):
Feature |
What It Enables |
New-User Guidance |
|---|---|---|
|
Snapshot-based clone workflows |
Keep enabled for template/clone workflows. |
|
Single-writer protection for image safety |
Keep enabled for VM safety and journaling/lifecycle workflows. |
|
Faster object state tracking |
Keep enabled with fast-diff workflows. |
|
Faster changed-block calculations |
Keep enabled for snapshot/clone operational efficiency. |
|
Advanced layout behavior |
Enable only when platform policy explicitly requires it. |
Expected Outcome:
The image appears in the Images table.
The image is available for attach/map workflows.
Tip
Thin provisioning means you can size for growth now and consume physical capacity as data is written.
Tip
Features are not one-size-fits-all. If unsure, keep your environment default feature selection and follow platform policy for changes.
Warning
Do not choose a non-rbd pool for RBD image workflows. If pool tagging is wrong, image operations and integrations can fail.
Warning
If required fields (Name * or Pool *) are empty, image creation
fails. Complete both required fields before submitting.
3.2.1. Use Image After Create (Next Step)
Purpose:
The image is created but not yet attached to a consumer workload.
When to Use:
Immediately after image creation, when you want the disk to be active.
Steps:
VM Attach Workflow:
Open your VM management interface.
Open the target VM.
Add disk/volume and select the created RBD image.
Save/Apply the VM storage change.
Validate the disk is visible in VM disk list and guest OS block devices.
Host-Level Workflow:
Open your approved host mapping workflow for RBD images.
Select the same pool/image and map it to the host.
Validate a new block device is visible on that host.
Create filesystem/mount only if this is a new empty disk for host use.
Expected Outcome:
The image transitions from created state to active workload use.
Pass Check:
VM path: image appears in VM disk list and is visible inside guest OS.
Host path: mapped block device is visible and usable on the host.
Warning
Do not attach one image as read/write to multiple independent workloads unless your platform policy explicitly supports that pattern.
Image Actions
Action |
Description |
|---|---|
Create (Top-Level Action) |
Provision a new RBD image in a chosen pool from |
Edit |
Rename image or change features. |
Delete |
Permanently removes the image (all snapshots must be deleted first). |
Copy |
Creates a full copy in the same or a different pool. |
Clone |
Creates a linked thin clone from a protected snapshot. |
Flatten |
Merges parent snapshot data into the clone, making it independent. |
Action Intent Guide (Why, When, Outcome):
Action |
Why To Perform |
When To Perform |
Expected Outcome |
|---|---|---|---|
Edit |
Align image name/features with workload policy. |
During naming cleanup or feature-policy updates. |
Metadata/features update on the same image. |
Copy |
Create a full independent duplicate. |
Before testing, migration, or pool relocation. |
New standalone image with no parent dependency. |
Create Snapshot |
Create a point-in-time restore checkpoint. |
Before risky changes or upgrades. |
Recoverable baseline for rollback/clone. |
Clone |
Provision fast child image from protected snapshot. |
Template-driven VM provisioning. |
Thin linked image sharing parent data initially. |
Flatten |
Remove parent dependency from clone. |
Before deleting parent chain or long-term independence. |
Standalone clone with higher local data usage. |
Delete |
Permanently remove unused image. |
After confirm no workload attachment/dependencies. |
Irreversible removal and capacity return. |
Action Flow Playbooks:
Create (Top-Level):
Click
+ Create Image(not row...menu).Complete required fields and feature selection.
Click Create Image.
Expected Outcome:
A new image row appears in the Images table.
Edit:
Click
...on the image row.Click Edit.
Update name/features.
Click Save.
Expected Outcome:
The image row reflects updated metadata/features.
Copy:
Click
...on the image row.Click Copy.
Choose destination and name.
Confirm.
Expected Outcome:
A new full copy appears in the destination pool.
Tip
Use Copy when you need full independence immediately and do not want a parent-child chain.
Create Snapshot:
Click
...on the image row.Click Create Snapshot.
Enter name.
Confirm.
Expected Outcome:
Snapshot count increases and the snapshot appears in Snapshots tab.
Tip
Snapshot before any operation that can change filesystem or application state on this disk.
Clone:
Expand image row.
Open Snapshots tab.
Protect snapshot.
Click Clone on the protected snapshot.
Expected Outcome:
A linked thin clone appears in Images with parent relationship.
Warning
Clone requires a protected snapshot. Without protection, clone action is blocked by design.
Flatten:
Click
...on the clone image.Click Flatten.
Confirm.
Expected Outcome:
Clone becomes independent from the parent snapshot chain.
Warning
Flatten is data-intensive and can increase pool usage and write load.
Delete:
Confirm image is detached from active workloads.
Confirm snapshots are removed.
Click
...> Delete.Confirm.
Expected Outcome:
Image is permanently removed and space is returned.
Warning
Delete is irreversible. Use Trash when recovery window is required.
Expanded Row Tabs
Expand an image row using chevron >.
Details
Details - Image ID, features, stripe unit/count, data pool, parent (if cloned), timestamp, and usage.
Purpose:
To verify the image identity and dependency state before action.
When to Use:
Immediately after create/copy/clone.
Before delete, flatten, rollback, or migration decisions.
Expected Outcome:
You know whether image is standalone or parent-linked and whether feature state matches intended policy.
Tip
Check Parent first. If populated, plan clone/flatten operations before
parent cleanup.
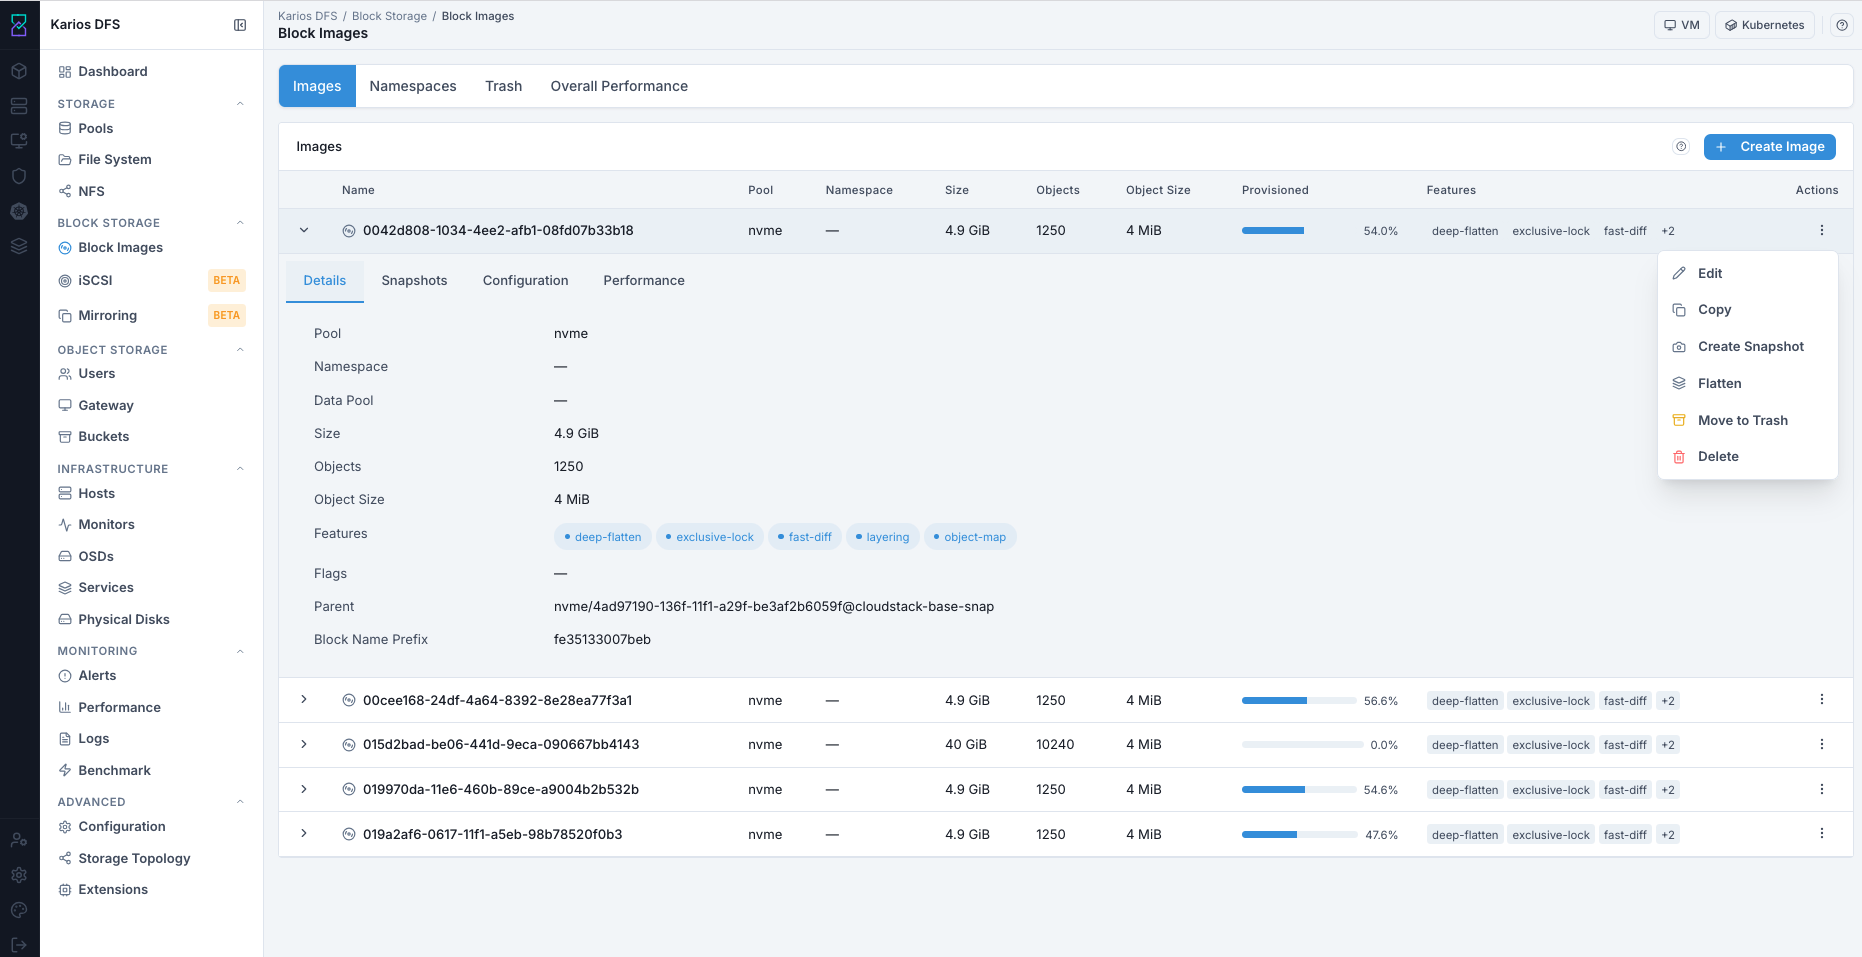
Images Tab Expanded Row - Details Tab (Reference Example Values).
Snapshots
Snapshots - Lists all snapshots with name, size, and protected status. Allows snapshot operations inline.
Purpose:
To protect current state before risky changes and to enable clone workflows.
When to Use:
Before upgrades, config changes, or data migration on attached workload.
Typical workflow:
Create snapshot.
Protect snapshot.
Clone snapshot if needed.
Rollback only when required and controlled.
Expected Outcome:
You maintain restore checkpoints and controlled parent/clone lifecycles.
Warning
Rollback discards writes made after the snapshot point. Before rollback, stop write activity and ensure the image is detached/unmapped (or VM is powered off) to avoid data inconsistency.
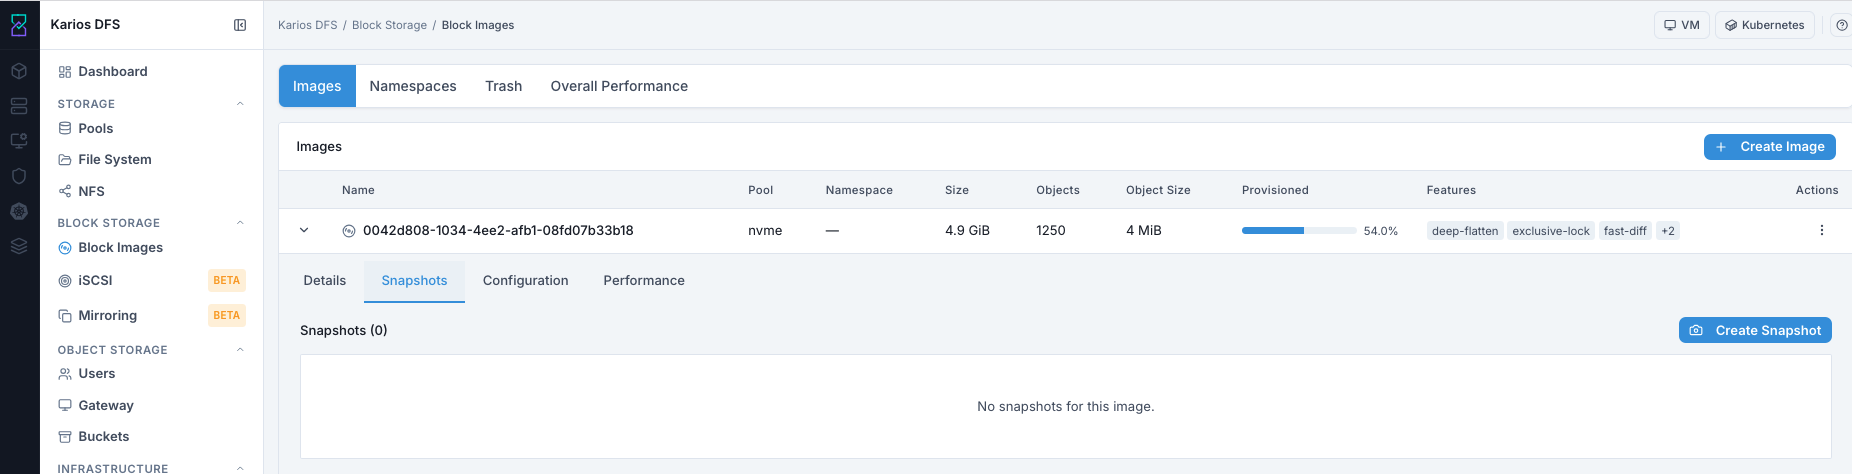
Expanded Image Row - Snapshots Tab (Reference Example Values).
Configuration
Configuration - Advanced per-image configuration options (e.g., rbd_cache,
rbd_qos settings).
Purpose:
To validate effective advanced settings and inheritance source.
When to Use:
During troubleshooting, performance tuning review, or policy audit.
Validation focus:
Confirm key values are expected.
Confirm source inheritance behavior.
Avoid changing advanced settings without platform guidance.
Expected Outcome:
You confirm whether image behavior is using global defaults or overrides.
Warning
Incorrect advanced overrides can degrade performance or introduce inconsistent behavior across images.
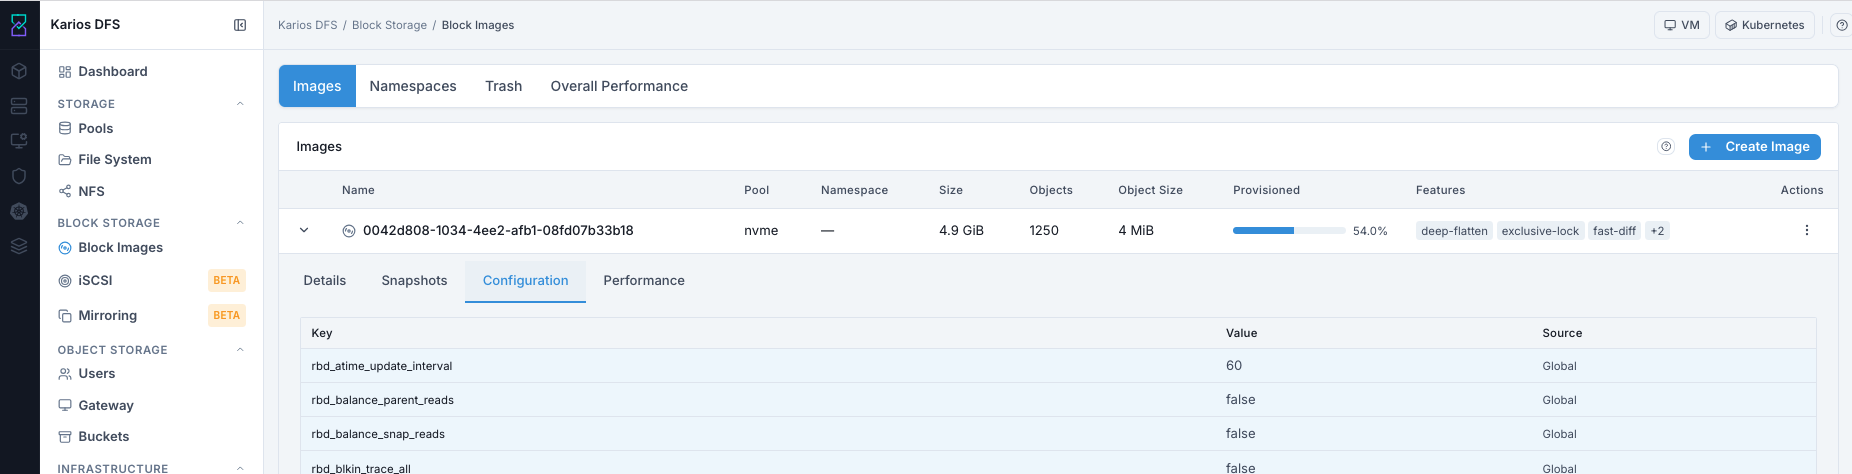
Expanded Image Row - Configuration Tab (Reference Example Values).
Performance
Performance - Read/write IOPS and latency graphs for this specific image.
Use this tab when you need per-image diagnosis.
Purpose:
To isolate which image is generating load or latency.
When to Use:
When overall charts spike and root cause is unclear.
During validation after copy, clone, flatten, or workload changes.
Expected Outcome:
You identify whether this image is healthy, idle, or under abnormal pressure.
Tip
Correlate spikes with recent actions (copy/flatten/clone) before escalating.
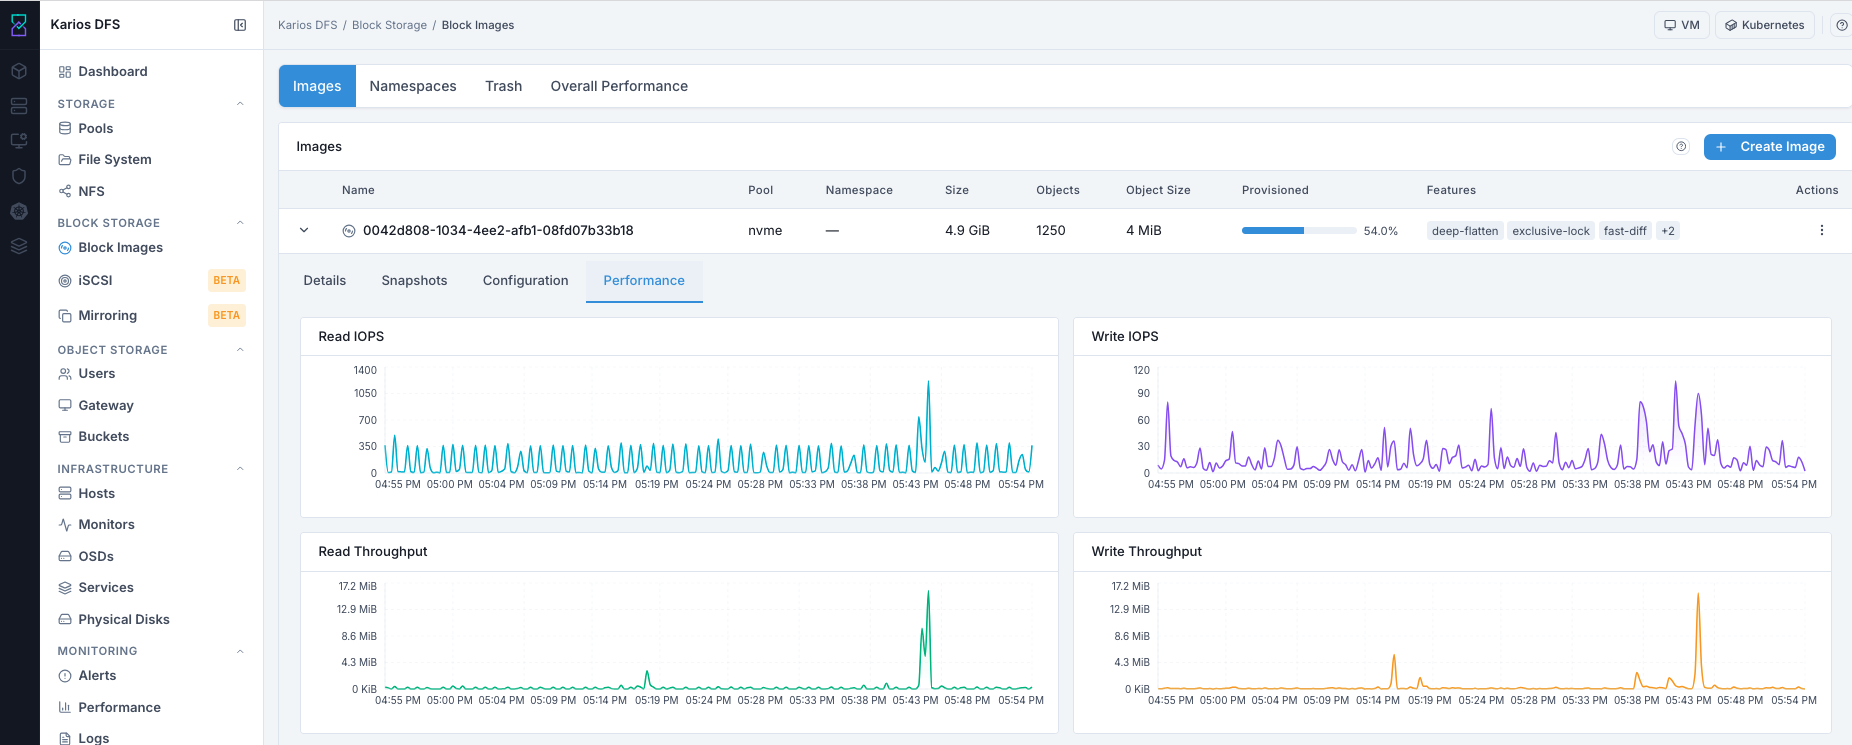
Expanded Image Row - Performance Tab (Reference Example Values).
Namespaces Tab
RBD namespaces partition images within a pool, providing isolation between tenants or workloads without requiring separate pools.
Purpose:
To isolate workloads logically inside the same pool.
When to Use:
Multi-tenant environments.
Separation of production, staging, and test workloads.
Expected Outcome:
Cleaner image organization and reduced cross-workload visibility.

Namespaces Tab (Reference Example Values).
Columns
Column |
Description |
|---|---|
Namespace |
Namespace name within the pool. |
Pool |
The pool this namespace belongs to. |
Create A Namespace
Purpose:
To create a dedicated isolation boundary for new images.
When to Use:
Before provisioning a new workload group inside a shared pool.
Open Namespaces.
Select pool.
Click Create.
Enter namespace name.
Confirm.
Expected Outcome:
You can create images using
pool/namespacenotation.
Tip
Use consistent naming for namespaces (for example environment or team based) to simplify operations and support handoffs.
Delete A Namespace
Purpose:
To clean up unused logical partitions.
When to Use:
After all images in that namespace are retired or migrated.
Open Namespaces.
Select the pool.
Delete the namespace.
Requirement:
All images inside the namespace must be deleted first.
Warning
Namespace delete fails if any image still exists in that namespace.
Trash Tab
The Trash holds soft-deleted images. Images moved to trash are not immediately purged - they can be restored within a retention period.
Purpose:
To provide a recovery window before permanent deletion.
When to Use:
When you are not fully certain deletion should be irreversible.
Expected Outcome:
You can restore accidental deletions during retention period.
Columns
Column |
Description |
|---|---|
Image |
Original image name. |
Pool |
Pool where the image was stored. |
Status |
normal (waiting) or purging (actively being deleted). |
Deletion Time |
When the image was moved to trash. |
Expiration Time |
When the image will be automatically purged. |
Restore
Purpose:
To recover a soft-deleted image without rebuilding it.
When to Use:
Image was moved to trash by mistake or needs to be reactivated.
Open Trash.
Select image.
Click Restore.
Expected Outcome:
Image returns to active Images tab.
Tip
Restore as soon as decision is made. Do not wait near expiration.
Purge
Purpose:
To permanently remove an image from trash immediately.
When to Use:
Only after confirming the image and its data are no longer needed.
Open Trash.
Select image.
Click Purge and confirm.
Expected Outcome:
Image is permanently removed.
Important restriction:
Images with linked clones cannot be purged until all clones are flattened or deleted.
Warning
Purge is irreversible. There is no recovery after purge completes.
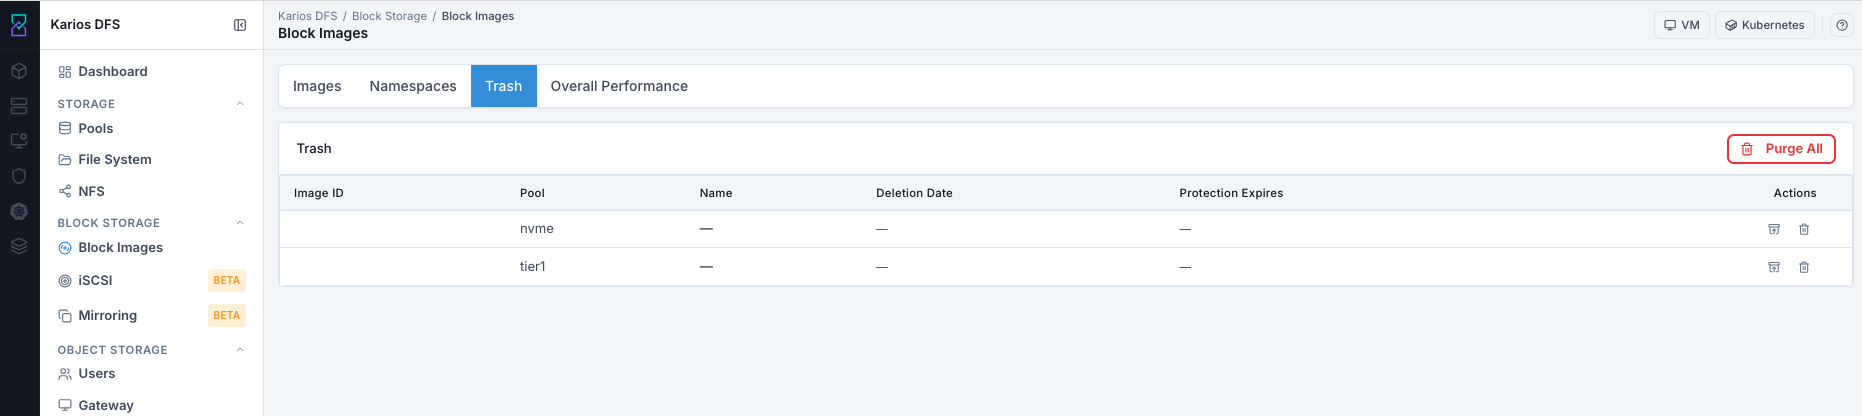
Trash Tab (Reference Example Values).
Overall Performance Tab
Shows cluster-wide RBD read/write metrics over time. Use the time range selector to zoom in on a specific window.
Purpose:
To validate block-storage health and identify cluster-wide behavior changes.
When to Use:
During daily checks, incident response, and post-change validation.
Expected Outcome:
You can decide whether investigation should continue at per-image level.
Panels
Panel |
Description |
|---|---|
Read / Write IOPS |
Total operations per second across all RBD images. |
Read / Write Throughput |
Total data rate (bytes/sec) across all RBD images. |
For per-image performance, expand a row in the Images tab and open the Performance sub-tab.
Tip
Use overall charts first, then drill into per-image performance to locate the exact source of load.
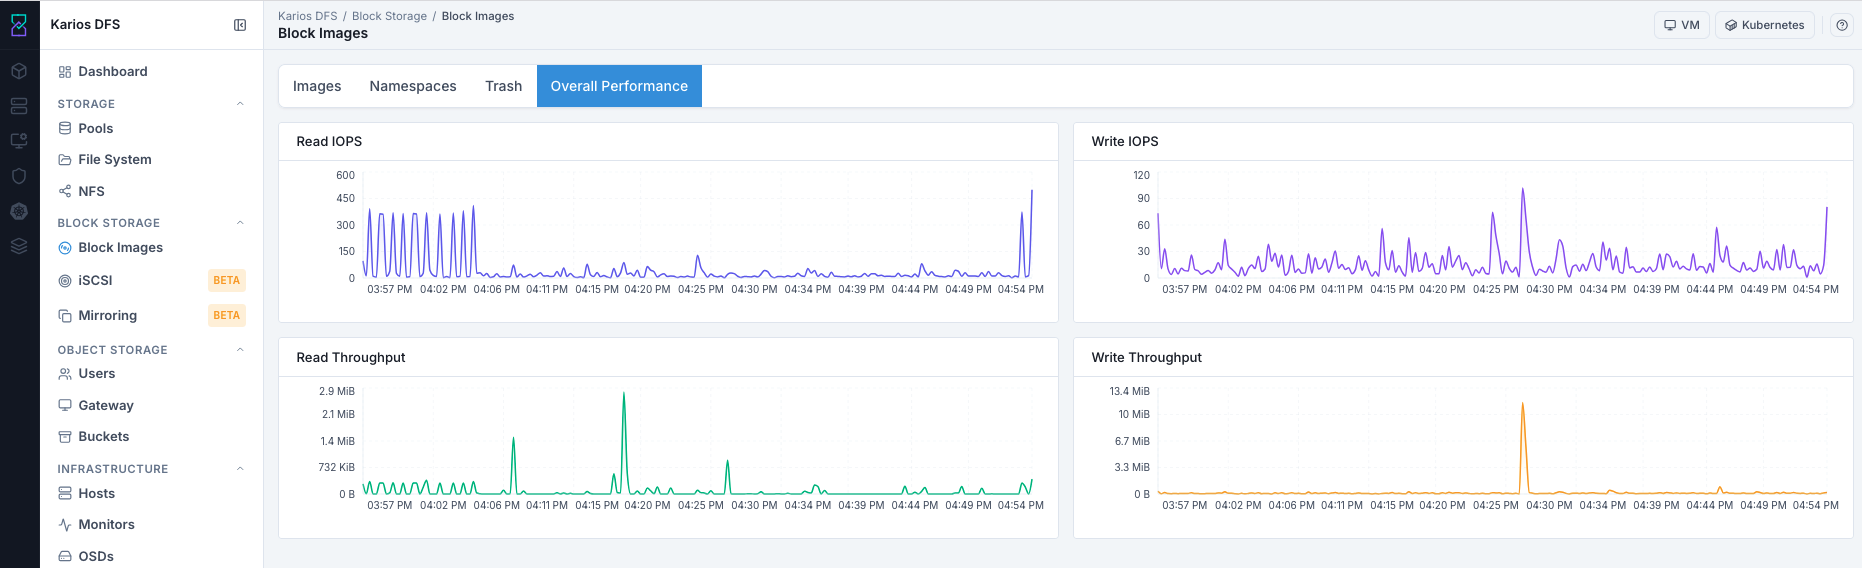
Overall Performance Tab (Reference Example Values).
Quick User Flow
# |
Action |
What To Do |
Pass Check Before Next Step |
|---|---|---|---|
1 |
Prerequisite Validation |
Confirm healthy |
|
2 |
Create Image |
Complete |
New image row appears with expected name/pool/size. |
3 |
Validate Details |
Expand row and confirm key metadata and parent state. |
Details reflect intended image configuration. |
4 |
Create Snapshot |
Create snapshot before risky changes. |
Snapshot appears in Snapshots tab. |
5 |
Protect + Clone (If Needed) |
Protect snapshot and run clone action. |
Clone appears with parent relationship. |
6 |
Flatten (If Needed) |
Flatten clone before parent-chain cleanup. |
Clone parent dependency cleared. |
7 |
Trash Workflow |
Restore or purge based on retention decision. |
Image restored or permanently removed as intended. |
8 |
Performance Validation |
Review overall and per-image performance graphs. |
IO behavior aligns with expected workload activity. |
Troubleshooting
Problem |
Likely Cause |
What To Do |
|---|---|---|
Create image disabled or missing |
Role restriction or no |
Verify role permissions and confirm a healthy |
Pool list empty in create form |
No eligible pool |
Go to Pools and set |
Cannot delete image |
Snapshots still exist |
Delete snapshots first, then retry delete |
Cannot delete snapshot |
Snapshot has linked clones |
Flatten or delete dependent clones before deleting snapshot |
Cannot purge trashed image |
Clone dependency exists |
Flatten or delete dependent clones, then purge again |
Clone action unavailable |
Snapshot not protected |
Protect snapshot first, then run clone |
Image created but not usable by VM |
Image not attached in VM storage workflow |
Open VM storage settings, attach the image, and validate disk list refresh |
Image attached but guest OS does not see disk |
Guest did not rescan devices or attachment not applied |
Revalidate VM disk list, rescan guest devices, and confirm image mapping |
Unexpected feature behavior after create |
Feature selection does not match workload policy |
Review feature set in image details/edit and align with policy baseline |
Flatten takes long time |
Data-intensive copy-on-write merge |
Monitor performance charts and wait for completion |
High cluster write spikes |
Background copy/flatten/recovery activity |
Correlate with active operations and drill down to per-image performance |
Unexpected image status (degraded/migrating) |
Backend pool or cluster activity |
Check pool health, alerts, and ongoing operations before new actions |
Restore not available |
Trash retention expired or purge completed |
Recovery is no longer possible; recreate image from backup/template |
Warning
If uncertainty exists about data deletion impact, stop and use snapshot or trash workflow instead of immediate delete/purge.
Note
If issue persists after these checks, escalate using Monitoring > Alerts
with image name, pool, and action timestamp for faster support triage.
Key Concepts
Thin Provisioning
The image reserves its stated size but only consumes space for data actually written. A 1 TB image with 10 GB of data uses ~10 GB.
Layering (Clone)
A cloned image shares all parent data via copy-on-write. Only modified blocks are written to the clone’s pool. Flatten breaks this link.
Exclusive Lock
Prevents multiple simultaneous writers from corrupting the image. Required for live migration and journaling.
Object Map
Tracks object allocation state for the image so related operations can run more
efficiently. object-map improves metadata-aware checks and supports
fast-diff behavior.
Fast Diff
Records changed extents between snapshots so incremental and differential workflows can identify what changed without scanning the full image.
Striping
Controls how image data is distributed using stripe unit/count settings. Appropriate striping helps throughput for sequential workloads and large IO patterns.